Tuesday, September 27, 2022

Signs It Might Be Time to Remove Your Tree

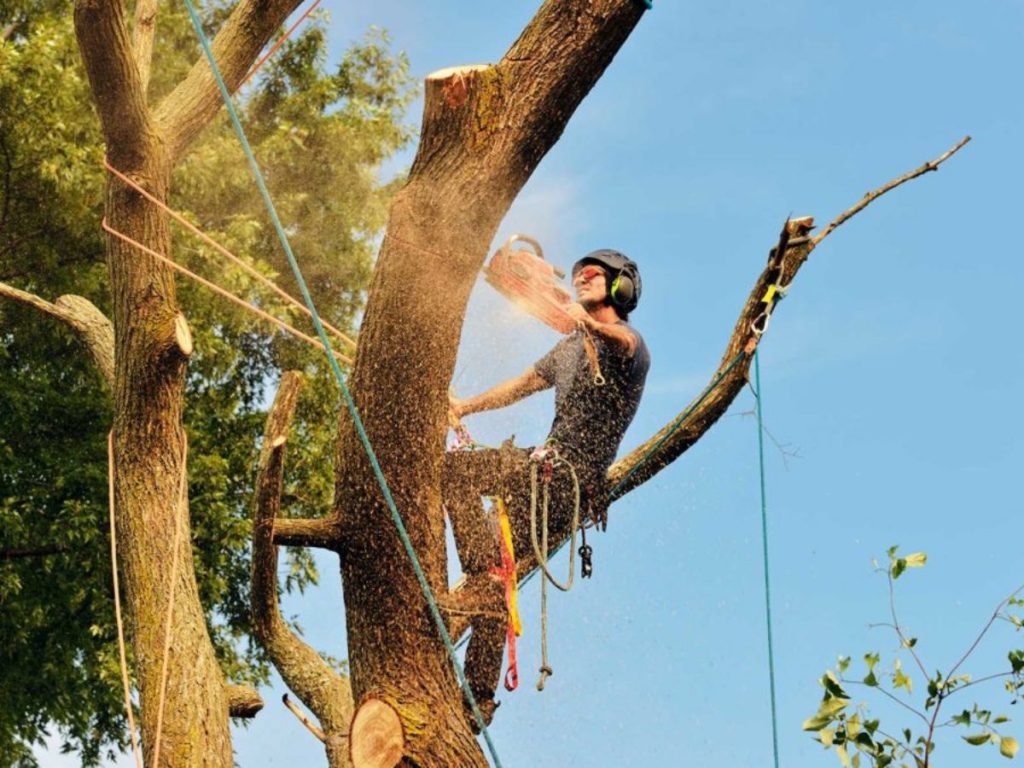
If your tree is starting to show symptoms of disease or decay, it may be time to remove it. A few of these signs include: root problems, compromised structural integrity, and fungi and disease. There are many other warning signs that you should watch for, but these are just a few of the most common.
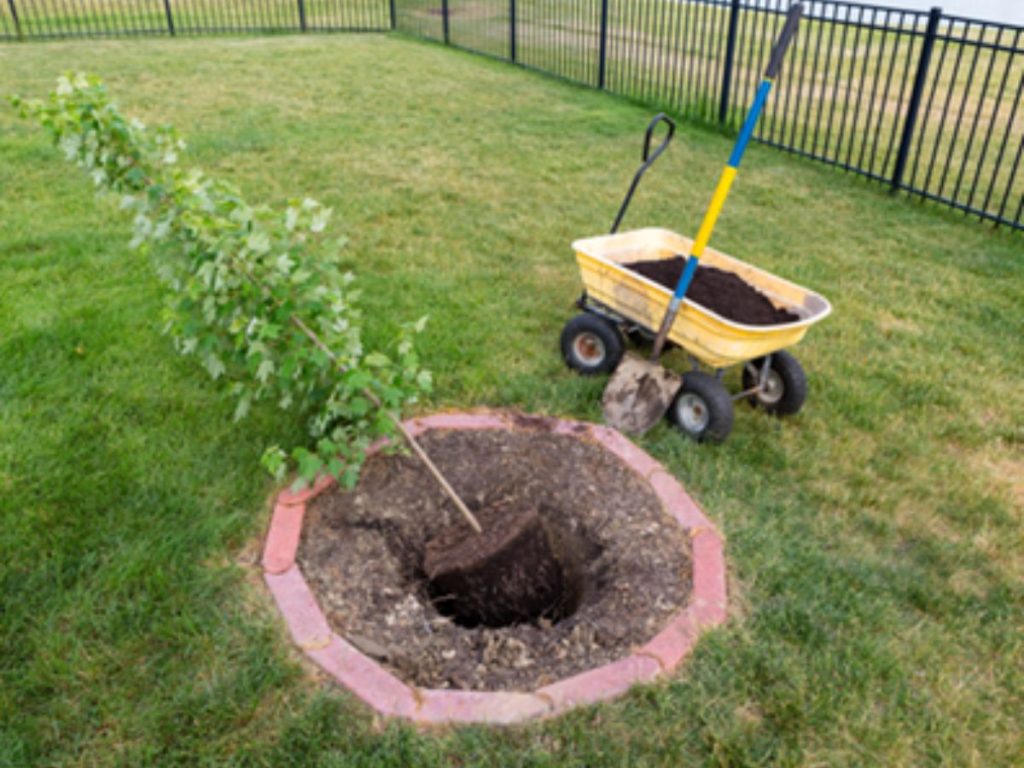
Root problems

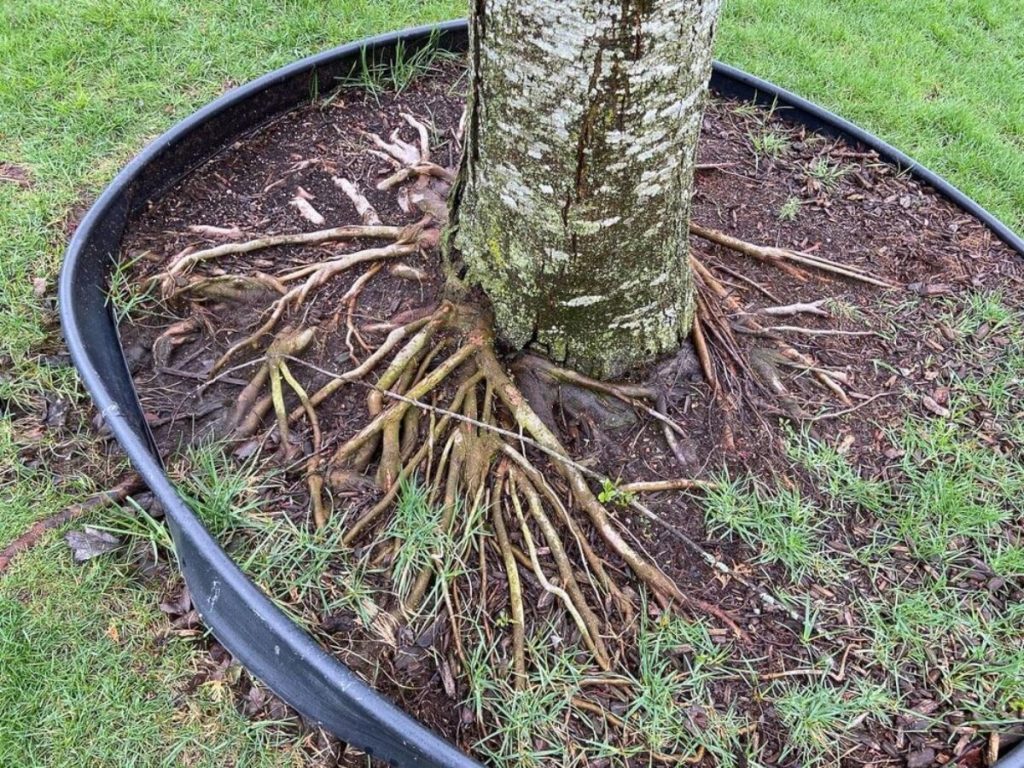
One of the most common signs it might be time to remove your tree is if you notice that its roots are unhealthy. If the roots are discolored, cracked, or even severed, it may be time to remove the tree. In addition, the soil surrounding the base of the tree may begin to lift or crack. This could be a result of the tree’s root ball shifting. If you notice any of these symptoms, you should contact an arborist.

Damaged roots indicate a tree that is weakened structurally. These roots are also susceptible to damage caused by wind. Wind can cause the roots to lift and cause the tree to fall over. A professional arborist can determine whether it’s time to remove the tree and determine what the best course of action is.

Cracks in the trunk are another sign that it might be time to remove your tree. Cracks in a tree trunk can indicate structural damage, especially if there are a lot of limbs on the tree. If the tree’s trunk is weak, it can’t support all the branches, and this can be a danger to your home.

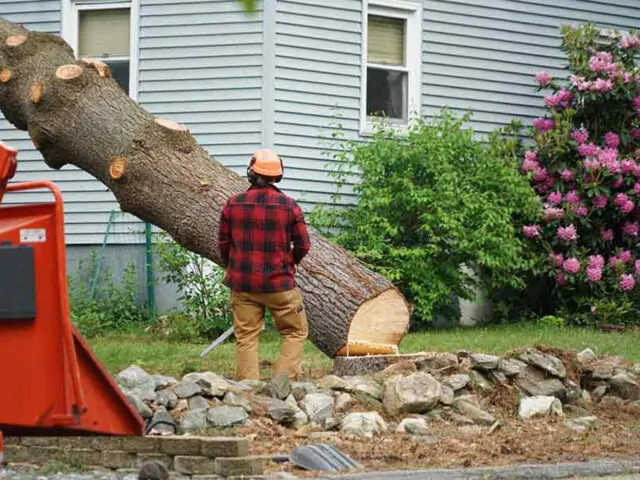
When the tree is leaning

A leaning tree can be dangerous and should be removed by a professional. A certified arborist can evaluate the condition of the tree and determine if it is a danger to people or property. He can also recommend the best course of action for fixing the problem. Sometimes bracing or cabling can be used to straighten the tree. Other times, it is better to leave the leaning tree alone.

A leaning tree may be caused by various causes. It may have a damaged root system, or it may be due to storm damage. Other reasons include being too close to power lines, or blocking roadways, sidewalks, or traffic signals. While pruning can solve the problem, there are times when removal is the only option.

Keeping the roots healthy is important for the health of the tree. Having healthy roots will prevent leaning. In addition, a tree planted in an area that is too wet is more prone to topple or lean in windy conditions.

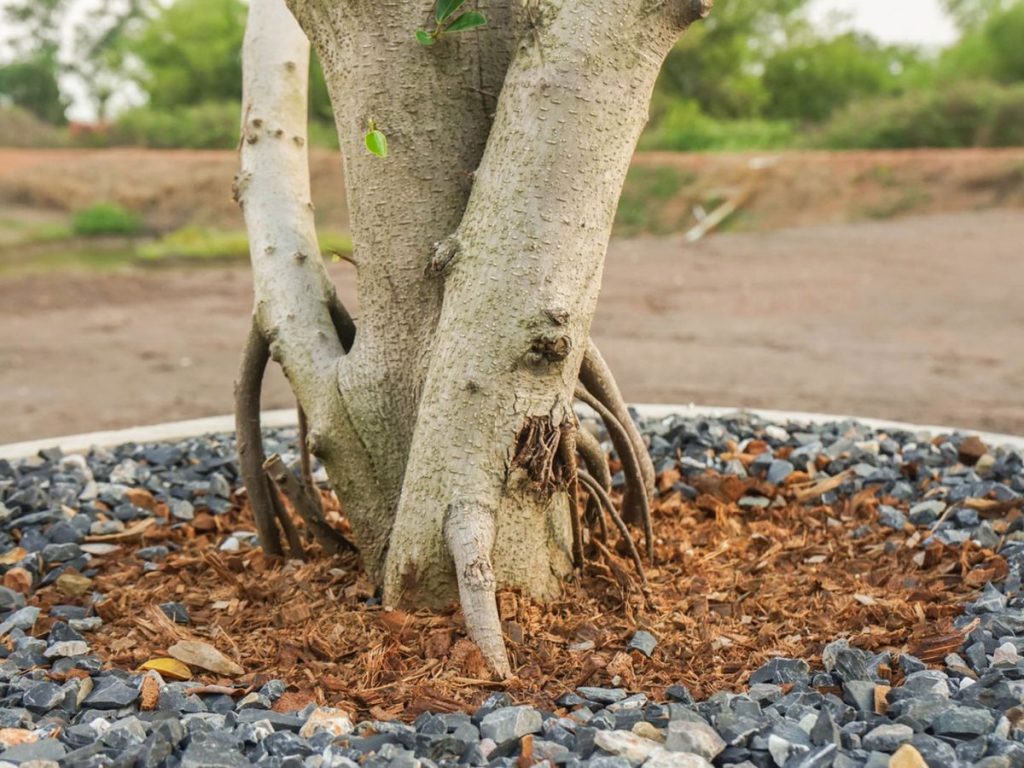
Compromised structural integrity

There are a number of reasons why the structural integrity of a tree may be compromised. Some structural defects are not obvious, and may remain undetected for many years. In this case, the tree may still remain big and green, but it may not function properly. If the tree is subjected to a strong wind, it may topple over.

Another potential cause of compromised structural integrity is the presence of fungus or insects. Depending on the severity of the damage, the tree may not have an immediate health threat, but it may be vulnerable to infestation by insects or fungus. An arborist can assess the condition of a tree and determine the proper course of action.

Trees that are planted too close to homes may pose a safety risk to people and property. A large limb can fall on a home, causing extensive damage. Trees can also be infected with a disease, which can spread through the root system.

Fungi and disease

Fungi and disease can damage your tree in a number of ways, but you can easily detect them early. Look for signs of decay on the leaves and limbs of your tree. If you see a dead branch, it might be time to remove it. Moreover, a tree with few leaves may also be suffering from an ailment. A dying tree can become unstable and may even fall, if it is not treated promptly.

If you notice a mushroom-like growth on your tree, it might be infected with fungus. This type of fungi can cause extensive damage to a tree, because they can get into the tree through wounds in the protective bark. The fungi can also cause the decay of the tree’s structure. Additionally, decaying trees are often homes for various pests, including termites and carpenter ants. A tree that is infested with these pests is almost certainly going to die.

The signs of a sickly tree should be immediately investigated by a tree care professional. While some tree ailments can be treated at home, others require a certified arborist to diagnose the condition.

Your tree is in the wrong location

If you have a dead tree in the backyard, it is important to know that it is in the wrong location. Dead trees have no green needles, which indicate that something is very wrong. A tree that is not healthy will die from the top down. Check the entire tree and see if the trunk leans to the east or west. Leaning trees are at risk for falling, as most winds come from the west.

If the tree is bothering you

If the tree is causing you trouble, it might be time to remove it. Trees are often prone to falling branches and can cause a lot of damage to your property. In fact, falling branches can result in serious injuries, including fractured skulls and necks.

However, you should first consult with the neighbors before you remove the tree. They may be liable if the roots extend to their yard. Moreover, they may have to face court action for the removal of the tree. In this case, the neighbors should hire a certified arborist to assess the situation and make the necessary arrangements.

Contact Arborist

When you’re facing a situation where your tree has become unhealthy, contact an arborist to come out and assess the situation. This type of professional is trained to evaluate trees and can help you get your property back to its former glory. If the tree is suffering from a disease, it may be time to remove it. They charge by the hour and can also remove a tree that has a pest infestation.

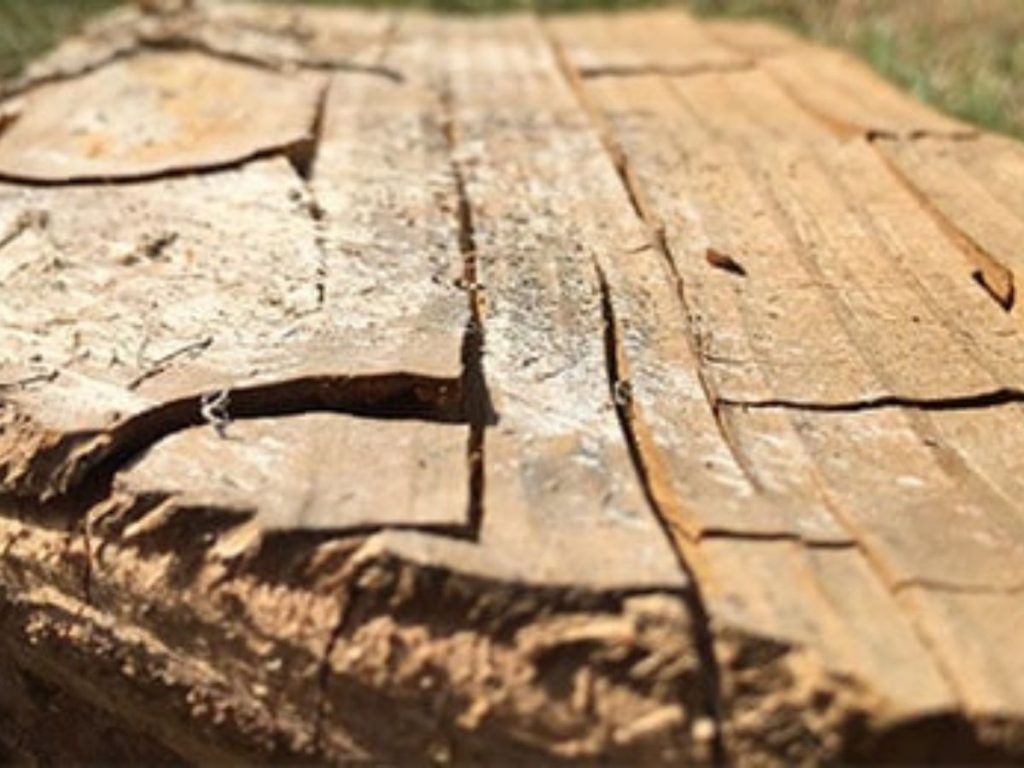
Some common signs that your tree needs to be removed include dying leaves, cracks in the bark, and soft crumbly wood. These are signs that the root system of the tree is decaying. The roots are the lifeblood of a tree and keep it alive by taking in all the water and nutrients it needs to grow. Early detection of these problems will enable you to fix them before the situation gets worse.

There are also some trees that grow so close to homes and power lines that they could be dangerous. They could fall on the roof or damage a home. Moreover, branches of a tree can break and injure a person. In such cases, it’s better to call an arborist than attempt to take down a tree yourself.

Conclusion

The process of removing a tree involves weighing the pros and cons of the removal. The removal of an old tree can help make way for new trees. It also allows for a healthy and diverse forest ecosystem. When a tree no longer serves its purpose, it is best to remove it, but there are some situations where it is better to leave it alone.


from AAA Tree Lopping Ipswich https://ift.tt/1x9WQac
via IFTTT

Wednesday, September 21, 2022

Top 10 things to do in Springfield Lakes, Queensland

Springfield Lakes is a beautiful, family-friendly community located in the heart of Queensland. There are plenty of things to do in Springfield Lakes, whether you’re a homeowner looking for home improvement inspiration or a tradesman looking for your next project.

Located just minutes from the Brisbane CBD, Springfield Lakes is a beautiful tree-lined community with something for everyone. Home to over 3,000 residents, Springfield Lakes is family-friendly and boasts a wealth of amenities and activities. For those who enjoy spending time outdoors, there are plenty of parks and walking trails, as well as a number of golf courses nearby. And for those who like to stay active, there are also a number of gyms and fitness centres.

If you’re looking for home improvement inspiration, you’ll find plenty of it in Springfield Lakes. There are a number of tree lopping and tree removal companies that operate in the area, so whether you’re looking to update your landscaping or simply clear some land for a new build, you’ll be able to find the services you need. And for tradesmen working in the area, there is no shortage of work opportunities either – from tree stump grinding and land clearing to general handyman work, there is always something to be done in Springfield Lakes. So whatever your reason for visiting, you’re sure to find something to love about this vibrant community.

Here are the top 10 things to do…

1. Take a walk or ride your bike around the lake.

Springfield Lakes is a beautiful, family-friendly community located in the heart of Queensland. The lake is a great spot for a walk or a bike ride, and you might even spot some wildlife! If you’re looking for something a little more active, tree lopping, arborist, tree removal, stump grinding, and land clearing are all available in the area. No matter what you’re looking for, Springfield Lakes is sure to have something for everyone to enjoy!

springfield lakes queensland

2.Visit one of the many parks in the area.

Springfield Lakes is home to a number of beautiful parks, each with its own unique offerings. For families with young children, there are several playgrounds scattered throughout the area. Those looking for a place to enjoy a picnic can find plenty of open green space perfect for spreading out a blanket and enjoying a meal. And for those who want to get closer to nature, there are several parks with trails ideal for hiking or biking. No matter what your interests are, there’s sure to be a park in Springfield Lakes that’s perfect for you.

3.Get involved in a community garden.

If you’re looking to get involved in a community garden, there are several options available to you. Community gardens are a great way to meet new people, learn about gardening, and help others grow their plants and vegetables. The Springfield Lakes Community Garden is one option that is open to residents of Springfield Lakes. The garden is located on Main Street, between 4th and 5th Streets. There is also the Fairbanks Community Garden, which is located on Floral Avenue, between 9th and 10th Streets. Give gardening a try today—you might be surprised at how much you enjoy it!

springfield lakes

4.Head to the library.

As the weather warms up, many of us are looking for ways to beat the heat. One great option is to head to the library. The library is a great resource for all ages, and you can always find something new to read or learn about. Springfield Lakes, QLD is home to a number of libraries, including the popular Eliza Day Library. The library offers a wide range of books, magazines, and other resources, as well as a comfortable place to relax and escape the heat. So next time you’re looking for a cool place to spend a hot day, be sure to head to the library.

5.Check out the local museum.

Springfield Lakes is a vibrant and growing community in Queensland, Australia. The area is home to a diverse range of people, and the Springfield Lakes Museum is a great place to learn about the history of the area and see some interesting artifacts up close. The museum has a wide range of exhibits, including an exhibition on the history of the area, which explores the growth of Springfield Lakes from a small rural town to a thriving urban center. There are also exhibitions on the local Indigenous population, early European settlers, and the area’s natural environment. The Springfield Lakes Museum is a great place to visit for anyone interested in learning more about this fascinating community.

6.Attend a community event.

There’s always something happening in Springfield Lakes! From fun community events like markets and festivals to sports and recreation activities, there’s something to suit everyone. Check out the Events page on the Springfield Lakes website to see what’s coming up. And if you’re looking for something more active, why not join a local sports team or club? There’s a great sense of community in Springfield Lakes, so get involved and meet some new people.

springfield lakes queensland

7.Go shopping at one of the many local shops.

Springfield Lakes is home to a wide variety of shops, from grocery stores to clothing retailers. Whether you’re looking for everyday essentials or a special outfit for a night out, you’re sure to find what you’re looking for at one of the many local shops. And with convenient parking and friendly staff, shopping in Springfield Lakes is a fuss-free experience. So next time you need to pick up some groceries or do some retail therapy, be sure to head to one of Springfield Lakes’ many wonderful shops.

8.Enjoy a meal at a local restaurant.

There are plenty of great places to eat in Springfield Lakes, so why not try something new? Whether you’re looking for a quick bite or a leisurely meal, there’s sure to be a restaurant that’s just right for you. For a casual dining experience, try one of the many cafes and takeaways in the area. If you’re after something more substantial, there are also several restaurants that serve up delicious home-cooked meals. And if you’re planning a night out with friends, there are plenty of bars and clubs in Springfield Lakes which offer a range of drinks and snacks. So whatever your dining plans are, make sure you check out the local restaurants in Springfield Lakes.

springfield lakes in queensland

9.Have some fun at the arcade or bowling alley.

Looking for a fun family activity? Why not head to one of Springfield Lakes’ many arcades or bowling alleys! The whole family can enjoy some competitive fun while spending time together. And there’s no need to worry about the weather – both arcades and bowling alleys are indoors, so you can stay cool and comfortable no matter what the temperature is outside. So next time you’re looking for something to do, remember that the arcade or bowling alley is always a great option!

10.Relax at home with friends and family.

Springfield Lakes is the perfect place to relax with friends and family. There are plenty of activities to keep everyone entertained, from swimming and boating to fishing and hiking. The spring-fed lakes are clean and clear, making them perfect for a refreshing dip. The scenic views are sure to please even the most picky photographers. So come on down to Springfield Lakes and enjoy some quality time with your loved ones!

No matter what you’re looking for, you’re sure to find it in Springfield Lakes, Queensland! So get out and explore all that this wonderful community has to offer today!


from AAA Tree Lopping Ipswich https://ift.tt/6yvVSUp
via IFTTT

Sunday, September 18, 2022

When is the Best Time to Transplant a Holly Tree?

There are a few important considerations when transplanting a holly tree. First, determine the range of the tree’s height. Next, choose a new location. And finally, make sure that the soil is dry enough to touch. In the summer, soil will dry out much faster than it does in the winter.

Check the range in height

First, make sure the soil you’re transplanting is well-drained. After preparing the planting site, apply Root Stimulator to encourage early root development. This will minimize plant shock and promote greener, more vigorous plants. Next, use mulch to conserve moisture and suppress weed growth. If you’re using wood mulch, leave it out for at least 6 months to allow it to cure. Avoid piling mulch against the base of the tree, as this can suffocate the plant’s roots.

If you’re planting a holly in a container, choose a holly variety with foliage that complements its surroundings. Most hollies can grow in containers for up to five years. However, dwarf varieties may require pruning more often than their larger counterparts.

If you’re transplanting a holly tree, make sure you check the height range first. Some trees can reach as tall as 12 meters! When transplanting holly trees, make sure you don’t transplant more than a half tree – if you’re transplanting an entire plant, the range in heights will be much wider.

Choose a New Location

Holly trees are popular ornamental trees that have glossy green leaves and berries of vibrant red color. Transplanting holly trees is not an easy process, so it’s important to choose a new location that has the same climate and soil characteristics as the one the tree is currently in. The new location should also be protected from excessive heat and wind.

To move a holly bush, start by digging a new hole about six inches outside of the leaves. Once you’ve dug out the root ball, remove it from the hole and place it on a wheelbarrow. Then, gently place the holly bush into the hole. Make sure that the soil is moist. You can add mulch around the base of the tree to keep the soil moist.

American holly trees come in dozens of species. They’re native to the central and eastern United States. The indigenous peoples of these regions used the berries as buttons, and traded them for goods. Because of this, it’s important to plant both male and female holly trees to ensure the berry production. Experts at the University of Kentucky recommend planting three females for every male holly tree.

Root Trimming

If you want to transplant a holly tree, it is best to do so during the winter months. The roots of this tree can be large and invasive. If they are not trimmed, you will risk causing damage to the plant. Root trimming is also a good idea if you want to transplant a holly tree to a larger location.

To transplant a holly tree, first remove the plant from its nursery pot. You should take care not to damage the holly tree when you pull it from the nursery pot. Next, loosen the feeder roots that are securing the holly to its pot. Then, plant it in a new hole. Be sure to water it thoroughly. You can also mulch the new planting with an organic mulch, which will help retain moisture. However, be sure to keep the mulch away from the trunk of the tree, as mulch around the tree can lead to fungal infections.

When transplanting a holly tree, it is best to do so during the fall or early spring. This will allow the new roots to grow without being stressed by the transplant. The summer season is particularly stressful on holly trees, so it is best not to transplant them during the summer.

Encouraging Feeder Roots

When transplanting a holly tree, it is vital to encourage feeder roots. These small lateral roots supply the tree with water and nutrients. This is especially important during the fall and early spring. The tree will be less stressed if the roots are encouraged early on.

To encourage feeder roots in a holly tree, choose a pot with good drainage. Hollies don’t like soggy soil. Soak the soil just enough to moisten the roots but not enough to make them soggy. Also, loosen the soil around the tree’s root ball.

Depending on the size of the tree, it may be necessary to prune the feeder roots. Doing so can encourage new feeder roots and reduce the shock of transplanting. Also, consider the size of the root ball. A larger root ball will contain more roots and weigh more.

Holly trees are dioecious. They require pollination from another holly plant to produce berries. This type of tree should be protected from strong winds to ensure it will survive the winter.

Plant Tree

Before you plant your holly tree, you’ll need to dig a hole large enough for its roots. Ensure that the soil is moist, but not soggy. Water your new tree thoroughly. If you don’t, the roots may be damaged and die. Once it’s established, lightly mulch the soil around it with 2 inches of mulch.

The best time to transplant a Holly tree is in late fall or early spring. The soil should be moist enough to work with, but not soggy that it drips. If possible, water your holly a day or two prior to transplanting. The roots should be wrapped in natural burlap and tied with twine. You’ll want the new hole to be no deeper than its previous location and the root ball should be at least twice as wide.

Holly pruning can be performed by cutting the bush’s stem in a circle with a spade or sharp knife. After that, cut the holly limbs off at a slight angle. Holly pruning is recommended once a year, just before the growing season begins. It’s important to avoid starving the roots. If you remove the holly bush, the roots will re-grow, as long as they receive a decent amount of sunlight.

The important in transferring the holly tree

Holly trees are popular for their glossy leaves and bright red berries, but they can be difficult to transplant. To give them the best chance of survival, the new location must have similar characteristics as the old one. For instance, the soil should be moist, well-draining, and slightly acidic. The new location should also be protected from wind and extreme heat.

Dig a new hole for the holly tree, and water it deeply to help it establish roots. Don’t add fertilizer to the soil because this can burn new roots. You should also mulch the area around the holly with organic mulch to help retain moisture. But remember to keep the mulch away from the trunk to prevent fungal problems.

After carefully assessing the new location for the tree, you can begin transferring it. Holly is often used for Christmas celebrations, but it actually originated from pagan rituals. Druids of ancient Britain held the holly tree sacred. Early Teutons hung holly in their homes in hopes of attracting fairies. In ancient Rome, holly was also used for the Saturnalia festival, in honor of the god Saturn.

Conclusion

If you are considering transplanting your holly tree, you need to be aware of certain conditions and timing. The ideal time to transplant a holly tree is when soil conditions are moist but not wet. You should also be sure to water it well before transplanting it. You should also mulch the ground around the tree with organic mulch, but be sure to keep it away from the trunk.

The American holly belongs to the Ilex genus, which includes hundreds of species of shrubs and trees. It grows as an upright pyramid in USDA plant hardiness zones 5 to 9. This plant can be transplanted, but you must ensure that you transplant it at the right time.

Holly trees require regular watering and sun exposure. Proper pruning will prevent excessive growth and increase the balance of the tree. Besides regular pruning, holly plants can be propagated by using cuttings. Cuttings can be taken from young branches during spring or early summer. Once they grow sufficiently, you can transplant them into a permanent spot.

Planting a holly tree in a garden is ideal if it is in a location where it receives direct sunlight. If the new location has high traffic, make sure to choose a spot that will allow them to grow in the right way. Remember that holly trees are sensitive to transplant shock, so be sure to plan carefully.


from AAA Tree Lopping Ipswich https://ift.tt/iMOAjzG
via IFTTT

Friday, September 16, 2022

Pruning Tips – How Much of a Tree Can You Cut Without Killing It?

Pruning Tips – How Much of a Tree Can You Cut Without Killing It?

To keep a tree alive, you should prune it only at certain times and follow certain guidelines. You should also avoid cutting off the top of the tree. Trees can bear a loss of about five to twenty percent of its volume without killing them. However, if you cut off more than this, the tree will die.

Pruning Mistakes to Avoid

Pruning shrubs and trees is a difficult task that requires careful planning to prevent unnecessary damage. People prune trees and shrubs for many different reasons, including reducing the size of the plant, opening the canopy, removing dead or damaged growth, and improving the overall shape. When cutting a tree or shrub, there are some common mistakes that people should avoid.

One of the most common mistakes people make when cutting a tree is cutting the branch off with just one cut. Cutting off a large branch all at once results in torn bark. Instead, experts recommend making several cuts through the branch, including a shallow cut on the underside. After pruning the branch, leave a stub that is two to four inches long.

There are two main types of branches to prune: main and lateral. They are also known as old wood and young wood. There are also inner and outer branches. Cutting the outer branch too close to the trunk is known as “flush cut” and removes the “branch collar” – a small swelling that covers the branch where it meets the trunk. This pruning mistake can make the wound more difficult to heal and can lead to disease.

Don’t Chop Off Tree Tops

Chopping off the top of a tree is a common backyard practice that can harm trees. This practice, also known as pollarding, dehorning, or heading, is a crime against nature. A group called Plant Amnesty has spent decades trying to end this practice.

Trees need large leaves and a large surface area for food. Cutting the top off depletes stored reserves and disrupts the tree’s food-making capacity. This method also encourages the growth of unwelcome “water sprouts” – dense upright branches that sprout out of the tree’s crown.

Only Prune Trees at Specific Times

Pruning is important to the health of your trees, but you need to be careful not to kill them. The process of pruning should only be performed by a Certified Arborist, who is skilled at climbing and possesses the proper equipment and insurance to avoid harming the tree. Pruning a mature tree should only be done during the dormant season, as pruning a tree at a different time will cause it to lose its vital energy and may result in disease and insect entry.

Winter is an ideal time to prune trees. This is when new growth forms, and it is much easier to visualize the structure of the branches. It is also easier to see where to cut a tree’s branches than in other seasons. Remember to prune before the weather warms up, so you don’t cut into the new growth.

Young trees need a helping hand as they grow, and early trimming can give them a firm foundation and a desirable aesthetic. You should focus on pruning only broken or dead branches at this early stage. You should wait at least two years before performing any heavy pruning, as this will ensure that the tree has fully established itself and will not be overly stressed from transplanting.

Understanding Correct Trimming Techniques

Proper pruning is an important part of landscape maintenance. If you do not understand proper tree care, you could damage or kill a tree. Incorrect pruning techniques can also lead to pest and disease problems. When cutting a tree, always cut only a small portion of the living limb. Check the shape of the tree from all sides before you make any cuts.

For thick, heavy branches, you should cut them flush with the trunk. A branch’s collar is a tissue area that contains a chemically protected zone. This protective layer will keep decay from spreading downward, and when a branch is cut at this point, the decayed tissue is walled off. This process allows the branch to fall away and regenerate in the spring.

Proper pruning should be done in the winter. Winter pruning is less stressful on trees, reduces the risk of infection, and promotes new growth in the spring. However, do not attempt to prune a tree when it is dormant. Doing so can kill a tree that has taken decades to grow.

Don’t Over-Prune Trees

Pruning trees is a natural part of tree care, but it can have harmful effects. Incorrect pruning can cause a tree to die. Trees should only be pruned between five and twenty percent of their crown at a time. Anything beyond this can trigger a stress response that produces unwanted growth. This growth uses up the tree’s energy reserves and requires more pruning. In addition, over-pruning can kill your tree, especially if it is already declining.

Pruning trees during certain times of year can cause them to be susceptible to airborne diseases and insects. Beetles, for example, are attracted to open wounds and can spread Dutch elm disease and oak wilt. This is why it is important to avoid pruning during warm months.

You can also protect your trees from sunburn by covering their trunks with shade boards. This is a temporary solution and should be removed after a season.

Lion Tailing

While it may sound like an easy way to cut a tree without killing it, lion tailing poses a danger to the tree. This method concentrates the weight of the branch on the ends, which causes the branch to sway and possibly break. It also leads to a weak, unhealthy tree.

Lion tailing is the opposite of proper pruning, which is done to create an attractive tree without killing it. This practice is detrimental to the tree’s health and structure, and should never be attempted unless you’re certain you don’t want to kill it. It also results in unbalanced limbs, which weakens the root structure, and eliminates the dampening effect of interior limbs. Consequently, lion tailing is generally not recommended by certified arborists. Instead, certified arborists prune trees carefully to ensure the tree’s health and safety.

Lion tailing involves the removal of interior branches to expose more of the crown. As a result, trees look unnaturally open, and their foliage-filled canopy appears like an umbrella. This makes the tree vulnerable to wind and sun damage. Furthermore, it can increase the appearance of water sprouts, which is a sign of stress.

Take Care of Clustered Branches

If you have clustered branches on your tree, there are a few steps you can take to keep them looking their best. First, prune them in the direction you would like them to grow. Usually, you will want to prune the branches on a north-south orientation so they will continue to grow in that direction.

Call Arborist

Trees are a vital part of our ecosystem, but many go unnoticed until they are cut down or destroyed. The amount of trimming that can be done to a tree depends on the species and the size of the tree, and should only be performed by a certified arborist. ISA certification and membership are mandatory for professionals in this field, who can provide expert advice on proper pruning techniques.

The first step in removing trees is to identify the location and size of the roots. You should use pruning shears to cut small roots that are fewer than one inch in diameter. Next, use a trowel or a shovel to dig up the remainder of the root. Once the roots have been removed, fill in the hole with earth. Then, monitor the tree closely for any signs of distress.

Despite the obvious safety risks, it is possible to cut a tree without killing it. The main rule is not to cut off too much of the tree’s root system. In general, you should only cut 25 percent of the root system. To determine this number, measure the diameter of the trunk at four feet off the ground. Multiply this number by six to determine the exact distance from the trunk you can cut off 25% of the roots.


from AAA Tree Lopping Ipswich https://ift.tt/kxEuHcr
via IFTTT

Thursday, September 15, 2022

What Is a Tree Arborist?

What Is a Tree Arborist?

If you decide to have a tree examined by a certified arborist, you will be hiring a professional with years of experience. They have taken and passed an examination to become certified arborists. If you want to know more about this profession, read on. This article will give you an overview of why you should hire an arborist and what services they provide.

Why Choose an Arborist for Your Tree Care?

When choosing a tree service provider, make sure that the arborist you hire has a valid license and insurance. It is also a good idea to check their references to see if they have any local clients. Additionally, you should ask to see any proof of liability insurance and worker’s compensation insurance. In addition, it is important to check if they are members of a professional association and have received any necessary certifications or training. These credentials will help you separate reputable companies from fly-by-night companies.

Choosing a professional tree service provider will ensure that your trees receive the care they need. An arborist is trained to understand the nuances of trees and can recommend species suitable for a particular area. They can also provide plant health care and preventive maintenance. These services may include cabling to support a weak branch, root system or soil aeration to promote root growth.

Trees add tremendous value to a property. They not only provide abundant shade and cooling, but they also absorb air pollution and sequester carbon. However, in order to provide these services, the trees must be kept in good health. Dead or diseased branches can be an eyesore and can become a liability. Certified arborists know how to care for trees safely and ethically.

Why Choose an Arborist for Your Tree Care?

When selecting an arborist, you want someone who has the proper training and experience to handle your trees safely. This includes knowing the proper tools to use and being certified by the International Society of Arboriculture. Arborists also have extensive training in first aid and preventing injuries and illnesses. In addition, arborists have the knowledge to prune trees precisely and maintain them in good health. This includes keeping your trees free of disease and insects.

Before hiring an arborist, you should make sure that they are licensed, insured, and have references you can check. It’s also a good idea to hire a TCIA-accredited company, as these are equipped with industry knowledge and safety procedures. Also, a reputable company should have references and reviews from satisfied customers. And if you’re unsure about their qualifications, you can always check online reviews to see what other people have to say about the company’s work.

Make sure the arborist you hire is insured and bonded. This is important because uninsured arborists can cause damage to neighboring property. Make sure to ask for proof of insurance, especially for property damage and workers’ compensation insurance. In addition, ask the arborist to provide local references. Lastly, make sure the arborist is a member of a professional association. This can help you identify reputable arborists from fly-by-night companies.

When Should I Hire an Arborist?

Hiring an arborist is an important decision for your property. Trees are an investment in your property, and you need to ensure their health and safety. It is important to find a professional with the proper training and credentials. It is also important to make sure the arborist has liability insurance and workers’ compensation.

An arborist’s services are not cheap. You may need to sign a contract before hiring them. You should avoid trying to cut corners and focus on other factors. For example, if you’re not sure about the hardness zone for your area, you should do some research yourself. You’ll need to find out which trees are best suited for your region.

The best arborists are insured and bonded. They are also qualified and licensed to practice their trade. A good arborist will show you all of their insurance documents. You don’t want to risk your property and finances. Besides liability insurance, the arborist should have worker’s compensation and workplace safety insurance. This insurance covers them if their workers become injured on your property. They should also carry unemployment insurance.

What services do they provide?

Tree arborists are highly skilled individuals who specialize in the care, maintenance, and diagnosis of trees. They often work as self-employed professionals or as part of a tree care company. There are also governmental agencies that employ arborists and urban foresters, who are trained in tree care and typically work in parks and recreation departments. In addition to providing tree care services, arborists also offer advice on how to care for trees.

Trees require regular attention and maintenance, especially in an urban landscape. An arborist can assess if the tree needs pruning or other treatments to maintain its health and structure, or if it needs to be moved for aesthetic reasons. An arborist can also prune trees to make them easier to walk under or to keep them away from wires and other obstructions. The timing and method of treatment depends on the type of tree and its species.

Tree arborists are also known as tree doctors because they use their knowledge of trees to diagnose and treat various tree diseases. They also offer specific services for different types of trees, including fertilization, drought mitigation, and pest and disease control. They can also assist homeowners and commercial property owners with the planning and maintenance of trees.

How much does it cost to hire an arborist?

The cost of hiring an arborist will depend on the type of work you need done. The cost of tree removal, for example, can cost several thousand dollars. However, the cost of tree trimming can be much lower than that of tree removal. In fact, stump removal can cost less than $200. An arborist’s fee will depend on how long they need to work on your property and the specific task.

The first step in hiring an arborist is getting quotes from several companies. It is vital to make sure that you are getting a competitive price. You should also check if the arborist has adequate insurance. A reputable arborist will be happy to show you their insurance documentation. Without liability insurance, you could end up being held financially responsible if something goes wrong on your property. Additionally, make sure that your arborist has workers’ compensation and workplace safety insurance. This way, if an accident occurs on your property, they will be able to pay for your medical bills. Lastly, make sure that they carry unemployment insurance and other insurance for their employees.

Costs vary widely. Tree removal services can cost as little as $100 or as much as $62,000, depending on the type of tree and the extent of work needed. If you are looking to save money, you might consider getting two quotes to compare costs. A tree removal quote should include the cost of the removal of the tree and the cost of the removal of the stump. The arborist will also know what equipment to bring, so you won’t have to pay double.

How long does it take to become an arborist?

While the exact length of time to become an arborist varies from person to person, there are a few common routes. If you have a passion for trees and are interested in getting your hands dirty, you can look for entry-level jobs and internships in the field. You can also shadow an arborist, as this will give you invaluable experience. As a beginning arborist, you will likely be performing hard labor and climbing trees, but this will help you build a solid knowledge base. Ultimately, this training will help you become a certified arborist, which can lead to a higher paying job.

In order to become an ISA Certified Arborist, you must have two to three years of experience in tree care. This experience should include planting, pruning, fertilization, and disease management. Additionally, you must complete a program that requires 30 continuing education units (CEUs). CEUs are earned by attending conferences and continuing education classes. In addition, you can earn CEUs by taking quizzes in the monthly Arborist News publication and signing up for webinars.

How dangerous is it to be an arborist?

An arborist must protect himself from the hazards of working with trees. These risks include heights, decaying wood, and falling debris. During an arborist’s work, he must also ensure the safety of his crew and surrounding neighbors. Some trees release poisonous fluids that can cause damage to people and property.

Being an arborist is not an easy job. You must be experienced and trained. It’s important to follow safety procedures and industry best practices. Tree work is dangerous and only qualified arborists should do it. According to the U.S. Bureau of Labor Statistics, arborists experience at least one fatality every two days. Injuries can result from falling trees, contact with power lines, and even electrocutions.

Working around power lines is particularly dangerous. They can knock people over or hit them in the head. As a result, arborists are required to use specialized safety equipment while working in close proximity to power lines. In addition to harnesses, arborists must wear glasses, chainsaw pants, and hard hats.

Conclusion

A tree arborist’s job is to maintain a healthy tree. Failure to do so can cause property damage and personal injury. There are a number of reasons that trees fail, including old-age, decay, and natural disasters. As a tree ages, it can become more hazardous. In some cases, trees are too close to structures that could collapse, posing a fire or other risk to people or property. In such cases, a tree arborist will recommend a corrective procedure.

A tree arborist uses specialized tools and equipment to safely maintain a tree. This equipment includes hand saws, rigging equipment, and pruning equipment. They also use climbing gear and safety gear. They are trained to handle hazards and minimize damage to properties. Tree removal can be a major job, requiring specialized knowledge and equipment.

Hiring an arborist is an excellent way to protect your landscaping investment. Many people spend time and money on landscaping and would not want to lose it. However, if they do not know how to properly care for their plants and trees, they may not achieve the results they want. A certified arborist will help ensure that your plants thrive and your landscaping stays beautiful.


from AAA Tree Lopping Ipswich https://ift.tt/KLYdpix
via IFTTT

Tuesday, September 13, 2022

How to Stop Wood Rot From Spreading

How to Stop Wood Rot From Spreading

Wood rot is one of the most destructive forces that can affect your home. If left unchecked, wood rot can spread quickly and cause extensive damage to your property. The good news is that there are a few things you can do to stop wood rot from spreading. In this blog post, we’ll discuss a few of those things so that you can keep your home in tip-top shape.

Wood rot is caused by a fungus that deteriorates the wood fibers. Wood rot is a common problem in humid climates and can be difficult to spot until it’s too late. The good news is that there are some things you can do to prevent wood rot from spreading and mitigate the damage it has already caused.

Causes of Wood Rot

There are two main types of fungi that cause wood rot: brown rot and white rot. Brown rot fungus feeds on cellulose, which is a major component of wood. This type of fungus typically affects outdoor furniture and decking because it needs oxygen to thrive. White rot fungus, on the other hand, feeds on lignin, another component of wood. This type of fungus typically affects indoor wooden structures like cabinets and flooring.

Common Signs of Wood Rot

The most common sign of wood rot is a musty smell. This is because the fungi release spores into the air as they feed on the wood. These spores can cause respiratory problems in humans, so it’s important to be on the lookout for them. Other signs of wood rot include discoloration, flaking, and crumbliness.

Preventing Wood Rot

One of the best ways to prevent wood rot is to make sure that your home is well-ventilated. This will lower the humidity level, which will make it harder for fungi to grow. You should also avoid using chemical cleaners on your wooden surfaces as they can damage the finish and make the wood more susceptible to rot. Instead, opt for gentle, pH-neutral cleaners. If you have any damaged or decayed wood in your home, be sure to repair or replace it as soon as possible.

Fixing the Source of the Problem

Wood rot is one of the most common problems that homeowners and tradesman face. It’s unsightly, dangerous, and can be extremely costly to fix. The good news is that there are a few simple steps you can take to prevent wood rot from spreading.

The first step is to remove any affected areas of the wood. This includes any loose or flaking paint, as well as any soft or spongy areas of the wood itself. Once you’ve removed these areas, you’ll need to treat the wood with a fungicide to kill any remaining spores.

The next step is to seal the wood. This can be done with a variety of products, but we recommend using a product like Perma-Seal. This will not only help to prevent future rot but will also extend the life of your wood.

Finally, you’ll need to repaint or refinish the area. This will not only improve the appearance of the wood but will also provide an additional layer of protection against future rot.

Wood rot can be a serious problem, but it doesn’t have to be. By taking a few simple steps, you can prevent wood rot from spreading and save yourself time, money, and headaches down the road.

Improving Ventilation

Another way to stop wood rot from spreading is to improve ventilation in the affected area. If possible, open up windows and doors to allow air to circulate. This will help to dry out any damp areas and prevent further damage from occurring. You should also consider running a dehumidifier in the affected area as well. This will help to remove any excess moisture from the air, which will also help to prevent wood rot from spreading.

There are a few things you can do to improve ventilation and stop the wood rot from spreading.

  • Inspect Your Home for Leaks: The first step in stopping wood rot is to inspect your home for leaks. Check all of the windows and doors in your home, looking for any gaps or cracks where air can seep in. If you find any leaks, seal them up with caulk or weatherstripping.
  • Install Vents in key Areas: Another way to improve ventilation is to install vents in key areas of your home, such as the attic and crawl spaces. These vents will help circulate air and prevent moisture from building up and causing wood rot.
  • Check out Your Gutters and Downspouts: Your gutters and downspouts play a crucial role in preventing wood rot by directing water away from your home. Make sure they are clean and free of debris so they can do their job properly. Also, check the ground around your home to ensure that the water is draining away from the foundation.
  • Repair any Damaged Wood ASAP: If you do find any signs of wood rot, it’s important to repair the damage as soon as possible. Remove all of the rotten wood and replace it with new lumber. Be sure to use a paint or sealant that is resistant to moisture to protect the new wood from rotting.

Wood rot can be a serious problem, but there are a few things you can do to prevent it from spreading. Inspect your home for leaks, install vents in key areas, check your gutters and downspouts, and repair any damaged wood as soon as possible. By taking these steps, you can help keep your home in top shape for years to come.

Repairing Damaged Wood

If you have already noticed some damage from wood rot, it’s important to repair it as soon as possible. The longer you wait to repair damaged wood, the worse the damage will become and the more difficult it will be to repair. When repairing damaged wood, be sure to remove all of the rotten wood before replacing it with new wood. Otherwise, you run the risk of reinfecting the new wood with rot fungi.

Whether it’s a loose door handle, a cracked windowsill, or a broken piece of furniture, dealing with damaged wood can be frustrating. Luckily, there are a few easy ways to repair damage and restore your wooden surfaces to their former glory. In this blog post, we’ll show you how to fix common problems like dents, scratches, and water damage. Keep reading to learn more!

  • Dents: Dents in wood are usually caused by heavy objects being dropped on the surface. To fix a dent, start by sanding away any rough edges. Then, apply wood filler to the area and let it dry. Once the filler is dry, sand it down until it’s flush with the rest of the surface. Finally, stain or paint the area as needed.
  • Scratches: Scratches in wood can be either superficial or deep. Superficial scratches can be removed with a little elbow grease and a damp cloth. First, rub the area with the cloth to remove any dirt or debris. Then, use a fine-grit sandpaper to gently buff out the scratch. Repeat this process until the scratch is no longer visible. For deep scratches, you’ll need to use wood filler. Simply apply the filler to the area and let it dry overnight. In the morning, sand down the filler until it’s level with the rest of the surface. Then, finish by staining or painting as necessary.
  • Water Damage: Water damage is one of the most common problems faced by homeowners. If your wood surfaces have been damaged by water, start by sanding away any roughed-up edges. Next, use a damp cloth to wipe away any mold or mildew that has begun to form. Once the surface is clean and dry, apply wood filler to any areas that are cracked or peeling. Let the filler dry overnight then finish up by sanding and staining/painting as necessary.

Dealing with damaged wood can be frustrating but luckily there are a few easy ways to fix common problems like dents, scratches, and water damage.

Conclusion:

Wood rot can be a serious problem for any homeowner. However, by taking measures to fix the source of the problem, improve ventilation, and repair damaged wood, you can stop wood rot from spreading and keep your home in good condition for years to come.


from AAA Tree Lopping Ipswich https://ift.tt/rhEBmP1
via IFTTT

How Much Is Tree Service Insurance and What Are the Benefits?

How Much Is Tree Service Insurance and What Are the Benefits?

If you’re considering starting a tree service, one of the first questions you’ll need to answer is how much insurance you’ll need. This type of insurance protects you and your employees from liability in the event of an accident, and it’s an important part of any business.

Tree service insurance is designed to protect homeowners and businesses from financial loss in the event that something goes wrong during a tree removal or trimming project. For example, if a tree service company damages your property while removing a tree, their insurance policy would cover the cost of repairs. Tree service insurance also covers injuries that occur on the job, as well as any damage caused by falling trees or branches.

The Pros of Tree Service Insurance

The biggest pro of tree service insurance is that it protects you from financial loss in the event that something goes wrong during a tree removal or trimming project. If a tree service company damages your property while removing a tree, their insurance policy would cover the cost of repairs. Tree service insurance also covers injuries that occur on the job, as well as any damage caused by falling trees or branches.

Another pro of tree service insurance is that it gives you peace of mind. Knowing that your tree service company is insured will give you confidence that they will take care of any problems that may arise during the course of their work.

The Cons of Tree Service Insurance

One of the potential cons of tree service insurance is that it may be expensive for some companies to purchase coverage. As a result, some companies may choose to work without insurance, which could put you at risk if something goes wrong during their work on your property.

Another potential con is that some companies who are insured may not be as careful as they should be since they know they’re covered financially if something goes wrong. This could lead to shoddy workmanship or even accidents.

Tree service insurance is a vital part of keeping your business safe. Not only does it protect your employees and equipment, but it also covers any damage that might be caused by your work. Here’s a look at how much tree service insurance costs and what benefits it can provide. But how much does tree service insurance cost, and what are the benefits?

How Much Does Tree Service Insurance Cost?

Tree service insurance is a type of liability insurance that covers property damage and personal injuries resulting from tree-related activities. This can include tree removal, trimming, and pruning. If you own a home with trees on your property, it’s a good idea to have some form of tree service insurance in case of an accident. But how much does this type of insurance coverage cost?

The average cost of tree service insurance is $919 per year. However, the price you pay will depend on a number of factors, including the size and type of your business, the number of employees you have, your location, and the amount of coverage you need.

For example, if you have a small tree removal business with just a few employees, you can expect to pay less for your insurance than if you have a large tree trimming company with dozens of employees. The same is true if your business is located in a rural area as opposed to a major city.

Another factor that will affect the price you pay for tree service insurance is the amount of coverage you need. If you only need basic coverage for property damage and personal injuries, you can expect to pay less if you need more comprehensive coverage that includes protection against third-party lawsuits.

The cost of tree service insurance will vary depending on your business’ size, location, and the amount of coverage you need. However, on average, you can expect to pay $919 per year for this type of insurance. If you own a home with trees on your property, it’s a good idea to have some form of tree service insurance in case of an accident.

What Are the Benefits of Tree Service Insurance?

When it comes to tree service, most people only think about the physical risks involved. But there are other risks to consider as well – like financial risks. That’s why tree service insurance is so important. Not only does it protect you from potential liability claims, but it can also save you a lot of money in the long run.

Most people are aware that tree service comes with its fair share of risks. After all, working with heavy machinery and large trees is not for the faint of heart. And while most tree service companies have safety protocols in place to minimize the risks, accidents can still happen. That’s why tree service insurance is so important. It protects you from potential liability claims, and can also save you a lot of money in the long run.

There are two types of tree service insurance: workers’ compensation and liability insurance. Workers’ compensation covers your employees in the event that they are injured while working on your property. Liability insurance, on the other hand, protects you from lawsuits that may arise from damages caused by your employees while they are working on your property. It’s important to have both types of insurance, as they each provide different levels of protection.

One of the biggest benefits of tree service insurance is that it can help you avoid costly lawsuits. If one of your employees damages someone’s property while working on your behalf, you could be sued for thousands of dollars – even if it was an accident. With adequate insurance coverage, your insurer will cover the cost of the lawsuit, saving you from having to pay out of pocket.

Another benefit of tree service insurance is that it can help you attract and retain good employees. In today’s litigious society, many people are hesitant to work for companies that don’t have adequate insurance coverage. By carrying both workers’ compensation and liability insurance, you’ll be able to assure potential employees that they’ll be protected in the event of an accident. This will give you a competitive advantage when recruiting new talent.

Tree service is a risky business – but it doesn’t have to be. By carrying adequate insurance coverage, you can protect yourself from potential liability claims and attract and retain good employees. In the long run, tree service insurance will save you time, money, and peace of mind.

Conclusion:

Tree service insurance is an important part of any business. The cost varies depending on a number of factors, but you can expect to pay anywhere from $500 to $5,000 per year for a policy that provides adequate coverage. There are several benefits to having tree service insurance, including peace of mind, protection for your employees, and protection for your business. In the event of an accident, insurance can help cover medical expenses, lost wages, and property damage. It can also help prevent legal action against your business. If you’re starting a tree service, make sure you get the coverage you need to protect yourself and your business.


from AAA Tree Lopping Ipswich https://ift.tt/VgfKZHM
via IFTTT

Monday, September 12, 2022

What is Tree Crowning and Why Should You Do It?

What is Tree Crowning and Why Should You Do It?

Most people are familiar with the basic tenets of tree care: water, fertilize, and prune. But there’s one important tree care practice that often gets overlooked: tree crowning. In this article, we’ll explain what tree crowning is and why it’s so important for the health of your trees. Keep reading to learn more!

What is Tree Crowning?

If you’ve ever seen a tree that looks like it’s been topiary-ed, then you’ve seen the result of tree crowning. Tree crowning is the process of trimming and shaping a tree’s branches and leaves to create a more aesthetically pleasing appearance. In addition to improving the look of your yard, tree crowning also has several practical benefits. Read on to learn more about the benefits of tree crowning.

Pruning Dead Branches

One of the most important benefits of tree crowning is that it helps to get rid of dead branches. Dead branches can be unsightly, but they can also be dangerous. Dead branches can fall and damage property or injure people. By pruning away dead branches, you can help keep your property and your family safe.

Improving Airflow

Another benefit of tree crowning is that it can help improve airflow around your home. This is especially important in the summer months when you’re trying to keep your home cool. By trimming away some of the branches and leaves, you can allow air to circulate more freely around your home. This will help keep your home cooler and improve your energy efficiency.

Preventing Storm Damage     

Yet another benefit of tree crowning is that it can help prevent storm damage. Overhanging branches can be ripped off in high winds, which can damage your roof or break windows. By trimming away these overhanging branches, you can help protect your home from storm damage.

As you can see, several benefits come with tree crowning. If you’re looking for a way to improve the look of your yard and make it safer at the same time, then tree crowning is a great option for you.

Why Is Tree Crowning Important?

There are several reasons why crowning is so important for the health and well-being of your trees. For starters, it helps to improve the tree’s overall appearance by giving it a more balanced look. Additionally, crowning can also help to increase the amount of sunlight and air circulation that the tree receives. This is important because it can help to prevent mold and mildew from growing on the leaves, as well as pests and diseases.

Another reason why crowning is essential is that it helps to keep the tree strong and stable. When branches are left unchecked, they have a tendency to grow in all different directions. This can cause the tree to become lopsided, making it more susceptible to damage during high winds or storms. By regularly crowning your trees, you can help them stay strong and stable for years to come.

Finally, crowning can also help to prolong the life of your trees by preventing problems before they start. For example, if a branch is starting to grow too close to power lines or your home, trimming it back will help to avoid any potential damage down the road.

As you can see, there are many good reasons why crowning is so important for your trees. If you have trees on your property, be sure to have them crowned regularly to keep them healthy and looking their best.

How Often Should You Crown Your Trees?

The trees in your yard are a vital part of your landscape and play an important role in the health of your property. To keep them looking their best, it’s important to have a regular pruning and maintenance schedule. But how often should you crown your trees?

The crown of a tree is the uppermost portion, made up of the branches and leaves. Properly maintained, the crown should be symmetrical and evenly distributed. Crowning helps to control the shape of the tree, promotes new growth, and prevents damage from wind and storms. Trees that are not regularly crowned can become top-heavy and unstable, posing a danger to your home and property.

How often to crown your trees depends on the type of tree, but as a general rule, most trees should be crowned every 3-5 years. Some trees, such as fruit trees, may need to be crowned more frequently to maintain their shape and produce high-quality fruit. Other factors that will affect how often you need to crown your trees include storm damage, disease, pests, and other injuries.

Conclusion:

Tree crowning is an important but often overlooked part of tree care. By regularly removing dead or diseased branches from the top of your trees, you can improve air circulation within the canopy, encourage new growth, and make your trees safer for yourself and your property. Most trees should be crowned every 3-5 years; however, the frequency with which you need to crown your trees will depend on several factors. If you’re unsure how often you should be crowning your trees, reach out to a certified arborist in your area for expert guidance.


from AAA Tree Lopping Ipswich https://ift.tt/LQk19yc
via IFTTT

Beware of Pruning Too Early!

Beware of Pruning Too Early!

Spring is in the air, and that means it’s time to get out into the garden and start sprucing things up! But before you grab your pruning shears and start hacking away, there are a few things you need to know. Namely, beware of pruning too early!

Pruning is a crucial part of plant maintenance, but timing is everything. If you prune too early in the season, you risk damaging new growth or even killing your plant. So when is the right time to prune? Read on to find out!

What is Pruning?

Many people think that pruning is simply the act of cutting back on plants. However, pruning is a horticultural practice that has many different purposes. When done correctly, pruning can promote plant health, encourage fruiting and flowering, and improve the overall appearance of your plants. Read on to learn more about the different types of pruning and when they should be carried out.

There are four main types of pruning: heading, thinning, shearing, and rejuvenation. Heading cuts are made to remove the tips of branches to encourage the plant to branch out. Thinning cuts are made to remove entire branches to increase air circulation and light penetration. Shearing cuts are made to create a uniform shape or hedge. Rejuvenation cuts are made to remove old or diseased growth to encourage new growth.

Pruning should be carried out in late winter or early spring while the plant is dormant. Heading, thinning, and shearing can be done at any time during the growing season. However, rejuvenation pruning should only be done in late winter or early spring while the plant is dormant. This is because rejuvenation pruning removes a large amount of growth, which can shock the plant if done during the growing season.

Pruning is an important horticultural practice that has many different purposes. When done correctly, pruning can promote plant health, encourage fruiting and flowering, and improve the overall appearance of your plants. There are four main types of pruning: heading, thinning, shearing, and rejuvenation. Pruning should be carried out in late winter or early spring while the plant is dormant.

Why You Shouldn’t Prune Too Early

Pruning too early in the season can be disastrous for your plants. For one thing, winter damage may not be immediately apparent, so you could end up removing perfectly healthy branches. Read on to learn more about why you should wait to prune certain plants and what types of plants fall into this category.

1. Pruning too early can stimulate growth.

You might think that stimulating growth would be a good thing, but in reality, it’s not always what you want. If you prune a plant too early in the season, you might unintentionally stimulate growth when the plant should be focusing its energy on other things. For example, if you prune a plant in early spring, it might start growing new leaves and stems when it should be flower buds. This can cause the plant to produce fewer flowers later on in the season.

2. Pruning too early can make a plant more susceptible to disease and pests.

Pruning a plant too early in the season can also make it more susceptible to disease and pests. This is because when you cut into a plant, you’re creating an open wound. If the plant isn’t fully healed by the time pests and diseases start attacking, it will have a harder time fending them off.

3. Not all plants benefit from being pruned in late winter or early spring.

Contrary to popular belief, not all plants benefit from being pruned in late winter or early spring. In fact, some plants actually suffer from it. Plants that bloom on last year’s wood, for example, should only be pruned after they’ve flowered. Otherwise, you run the risk of cutting off next year’s flowers! So, before you reach for the pruning shears, make sure you know which types of plants benefit from being pruned at which time of year.

As you can see, there are several good reasons to wait until late spring or summer to prune certain types of plants. So next time you’re tempted to get a head start on your gardening chores, resist the urge! Your plants will thank you for it later on in the season.

When Is the Right Time to Prune?

Tree pruning is an important part of maintaining a healthy, attractive landscape. But when is the best time to prune? The answer may surprise you.

Most people think that winter is the best time to prune trees, but that isn’t always the case. In fact, there are three main factors to consider when deciding when to prune your trees: tree type, pruning purpose, and time of year. Here’s a more in-depth look at each of these factors:

Tree Type: The first factor to consider is the type of tree you’re dealing with. Each type of tree has different needs and responds differently to pruning. For example, evergreens should only be pruned in late spring or early summer, while deciduous trees can be safely pruned at any time of year. Not sure what type of tree you have? Check with your local nursery or arborist for more information.

Pruning Purpose: The second factor to consider is the purpose of pruning. Are you trying to shape the tree, remove dead or diseased branches, or promote new growth? The answer to this question will determine how much and where you prune. For example, if you’re trying to shape the tree, you’ll want to make cuts closer to the trunk; if you’re trying to promote new growth, you’ll want to make cuts further out on the branches.

Time of Year: The third and final factor to consider is the time of year. As mentioned above, evergreens should only be pruned in late spring or early summer, while deciduous trees can be safely pruned at any time of year. But there are other considerations as well. For example, if you’re trying to encourage flowering, you’ll want to wait until after the flowers have bloomed; if you’re trying to prevent sap bleeding, you’ll want to wait until late fall or winter.

As you can see, there are a lot of factors to consider when deciding when to prune your trees. But don’t let that discourage you—pruning is an important part of maintaining a healthy landscape. Just take your time, do your research, and ask for help if you need it.

Conclusion:

So next time you’re tempted to head out into the garden with shears in hand, take a step back and make sure it’s the right time of year for pruning! A little patience now will pay off later when your plants are healthy and flourishing.


from AAA Tree Lopping Ipswich https://ift.tt/t8bDXTG
via IFTTT

Thursday, September 8, 2022

How to Identify Root Flare on Trees

How to Identify Root Flare in Trees

Many tree species have flared roots at the base of the trunk. This flare is an important structural component of the tree and helps to anchor the tree in the soil and resist tipping over in strong winds. The root flare also helps to facilitate water and nutrient uptake by the tree’s roots. Unfortunately, many trees are planted too deeply, which can cover up the root flare and cause problems for the tree. In this blog post, we’ll discuss how to identify root flares on trees.

What is Root Flare?

Root flare is the area of a tree’s trunk where the roots begin to spread out from the trunk. The root flare should be visible at ground level when the tree is planted at the correct depth. If the root flare is buried, it can cause problems for the tree, including difficulty taking up water and nutrients, decreased anchorage, and increased susceptibility to wind damage.

How to Identify Root Flare in Trees

There are a few ways that you can identify root flares on trees. One way is to look at the trunk itself. The root flare should be visible as a bulge or swell just above where the roots begin to spread out. Another way to identify root flares is by looking at the tree’s leaves. If the leaves are yellowing or dropping more than normal, it could be a sign that the root flare is buried and the tree is not able to take up enough water and nutrients. Finally, you can try digging around the base of the tree to see if you can expose any of the roots near the trunk. If you can’t find any roots near the trunk, it’s likely that the root flare is buried.

The root flare is an important part of the tree’s anatomy. It helps to support the tree and provides a transition area between the roots and trunk. A tree with an exposed root flare is not only more susceptible to damage, but it can also be a sign of underlying problems. If you think your tree might need a root flare excavation, here are some things to look for.

Signs that a Tree Needs a Root Flare Excavation

The most obvious sign that a tree needs a root flare excavation is if the roots are visible at the base of the tree. This can happen for a number of reasons, including poor planting practices, erosion, or compaction of soil around the base of the tree. If you see roots poking out of the soil, it’s time to call in a professional.

Another sign that your tree might need a root flare excavation is if the tree is leaning. This can be caused by many factors, including pests, disease, or simply inadequate support from the roots. If you see your tree leaning, it’s best to call in a professional arborist to assess the situation and determine if a root flare excavation is necessary.

A third sign that your tree may need a root flare excavation is if the bark is peeling or cracking at the base of the trunk. This can be caused by many factors, including insects, weather damage, or disease. If you see this happening to your tree, it’s best to call in a professional arborist to assess the situation and determine if a root flare excavation is necessary.

Conclusion:

Identifying root flares on trees is important for tree health. If you think that a tree may not have a visible root flare, there are a few things that you can do to check, including looking at the trunk for a bulge or swell just above where the roots begin to spread out, checking for yellowing or dropped leaves, or digging aroundthe base ofthe treeto see if you can expose any roots near the trunk. If you’re still having trouble findingtheroot flare,you can always consult a professional arborist or arborist who will be able to help you determine iftheroot flareis indeed buried. Thanks for reading!


from AAA Tree Lopping Ipswich https://ift.tt/Wfgy9nU
via IFTTT

How to Become a Certified Arborist

How to Become a Certified Arborist

Let’s face it, the trees are big. They can live for centuries, and some species grow to be over 100 feet tall. With all that size comes a lot of responsibility. That’s why there’s a profession dedicated to their care: arboriculture. Arborists are trained professionals who understand the science behind tree growth and pruning. They also know how to spot potential problems, like disease or pests, and take steps to mitigate those risks.

Becoming an arborist is a great way to combine your love of nature with your desire to help others. As a certified arborist, you’ll be able to work with homeowners and businesses to ensure that their trees are healthy and look great. Plus, you’ll have the satisfaction of knowing that you’re helping to preserve some of our planet’s most important resources.

If you’re thinking about becoming an arborist, here’s what you need to know.

Get a Degree in Arboriculture or Forestry

The first step on the road to becoming an arborist is to get a degree in arboriculture or forestry from an accredited university. This will give you the basic knowledge you need about trees and their ecology. Many Arborist companies prefer applicants with at least an Associate’s Degree, but a Bachelor’s Degree will give you a more comprehensive education and make you more competitive for jobs.

Complete an Internship or Apprenticeship

While completing your degree, you should also look for opportunities to gain hands-on experience in the field. Many arborist companies offer internships or apprenticeships for students who are interested in learning more about the profession. These programs can last anywhere from a few weeks to a year, and they’ll give you valuable experience working with trees and clients.

Get Certified

Once you have your degree and some experience under your belt, the next step is to get certified by the International Society of Arboriculture (ISA). To do this, you’ll need to pass an exam that covers topics like tree biology, safety, pruning, and risk management. Once you’re certified, you’ll be able to use the designation “ISA Certified Arborist” after your name. This certification will show potential employers that you’re serious about your career and that you have the skills they’re looking for.

Stay Up-To-Date on Industry Trends

The field of arboriculture is always changing as new research is published and new technologies are developed. To be successful in this career, it’s important to stay up-to-date on industry trends so that you can provide the best possible service to your clients. One way to do this is by joining professional organizations like the ISA or the American Society of Consulting Arborists (ASCA). These organizations offer continuing education opportunities that will help you learn about new developments in the field of arboriculture .

 Finding a Job

Once you have your degree, experience, and certification , it’s time to start looking for a job . You can search for open positions on job boards or websites like Indeed , Glassdoor , or Craigslist . You can also reach out directly to companies that interest you and inquire about open positions. When applying for jobs, be sure to highlight your education , experience , and certifications on your resume so that potential employers can see that you’re qualified for the position.

Conclusion:

Becoming a certified tree arborist is a great way to start a career in an industry that’s both rewarding and necessary. Trees play an important role in our ecosystem and our economy, so there’s always going to be a demand for qualified professionals. And with the right training and certification, you can be one of them!


from AAA Tree Lopping Ipswich https://ift.tt/QpyBgrN
via IFTTT

Wednesday, September 7, 2022

When to Transplant a Tree

When to Transplant a Tree

Many homeowners find themselves with a tree that has outgrown its planting spot. Maybe the tree was too small when it was originally planted, or maybe it’s just grown faster than anticipated. Whatever the case may be, if you have a tree that needs to be transplanted, when is the best time to do it?

Are you thinking about transplanting a tree on your property? If so, you’re not alone. Many homeowners choose to transplant trees for a variety of reasons, including improving the look of their landscaping, increasing privacy, and creating a windbreak.

No matter why you’re considering transplanting a tree, it’s important to know that timing is everything. The best time to transplant a tree is in the fall or winter when the tree is dormant. This is because transpiring leaves require less water during these months, making it easier for the tree to adjust to its new location.

Additionally, deciduous trees are less likely to suffer from transplant shock when they are moved during the dormant season. Evergreens, on the other hand, can be transplanted at any time of year. Keep reading to learn more about the best time to transplant a tree.

Have you ever walked through your neighborhood and noticed a tree that seems out of place? It might be too close to the house, crowding the sidewalk, or competing with other plants in the garden. In these cases, tree transplanting is a great option. Transplanting allows you to move the tree to a more suitable location, giving it room to grow and thrive. But when is the best time to transplant a tree? Read on to find out.

When to transplant a tree?

The best time to transplant a trees vary depending on the species of tree, but there are a few general guidelines that apply to all trees. For deciduous trees (trees that lose their leaves in winter), the best time to transplant is during the late fall or early winter, when the tree is dormant. This is because cooler temperatures help reduce stress on the tree, giving it a better chance of surviving the transplant. Evergreen trees (trees that keep their leaves all year) can be transplanted at any time of year, although spring or early summer is best. This allows the tree to establish its roots before winter sets in.

When choosing a transplant site, make sure it’s large enough to accommodate the adult size of the tree. The hole should be twice as wide as the root ball and just deep enough so that the tree is at the same level it was previously growing. Once you’ve transplanted the tree, water it deeply and regularly for the first few months. After that, continue to water it during dry periods. With proper care, your tree will soon take root in its new home and begin thriving.

Why Fall and Winter are the Best Times to Transplant a Tree

As we just mentioned, the best time to transplant a tree is in the fall or winter when the tree is dormant. This is because transpiring leaves requires less water during these months, making it easier for the tree to adjust to its new location.

Additionally, deciduous trees are less likely to suffer from transplant shock when they are moved during the dormant season. Evergreens, on the other hand, can be transplanted at any time of year. Keep reading to learn more about the best time by which you should transplant your particular type of tree.

The Case for Transplanting in Fall vs. Winter      

While both fall and winter have their advantages when it comes to transplanting trees, some experts believe that fall is actually the slightly better option—for two primary reasons. First of all, temperatures during this time of year are milder than they are in winter, which can make it easier on both you and your tree. Secondly, there tends to be more rain in fall than winter (at least in most parts of North America), which can help keep your newly transplanted tree hydrated as it adjusts to its new home.

Some tips for transplanting a tree during the growing season:

-Choose a cool, cloudy day for transplanting.

-Water the tree well the day before you plan to transplant it.

-Dig a large hole at the new location, wide enough so that you can easily spread out the roots of the tree.

-Carefully remove the tree from its current location, taking care not to damage the roots

-Place the tree in the hole at the new location and backfill with soil, tamping it down gently as you go.

-Water the tree well after transplanting.

How to transplant a tree?

One of the most important things to consider before transplanting a tree is the type of tree it is. Different types of trees have different root systems, which means they respond differently to being transplanted. For example, deciduous trees (trees that lose their leaves in winter) are best transplanted in late fall or early winter, while evergreen trees (trees that keep their leaves all year) are best transplanted in early spring.

Another thing to consider is the size of the tree. A small tree can typically be transplanted more easily than a large one. This is because a small tree’s root system won’t be as extensive, so there will be less damage to the roots when the tree is moved. Additionally, small trees are easier todig up and replant than large ones.

If you’re planning on transplanting a tree yourself, you’ll also need to take into account the amount of time and effort it will take. Transplanting a large tree is a big job, and it’s not something that should be undertaken lightly. If you’re not sure you can handle it, it’s best to hire a professional who has experience transplanting trees.

Conclusion:

If you follow these guidelines, you will be more likely to have success when transplanting a tree. Keep in mind that even with the best care, some trees do not survive being transplanted. If you are not confident in your ability to transplant a tree, it is always best to hire a professional who can do it for you

Whenever possible, it’s best to transplant trees in fall. However, if that’s not possible, spring is also a good option. Early spring should be avoided if at all possible, as that’s when new growth begins and the roots are more fragile. If you have any questions about transplanting your tree, please don’t hesitate to contact us! We would be more than happy to help.


from AAA Tree Lopping Ipswich https://ift.tt/5fveuFI
via IFTTT

Can You Transplant Established Trees?

Can You Transplant Established Trees?

Many people are under the impression that trees, once they are established, cannot be moved. This is simply not the case. With the right tools and know-how, transplanting an established tree is entirely possible. Of course, it’s not always easy, which is why we’ve put together this helpful guide. Keep reading to learn everything you need to know about transplanting established trees!

Why Would You Transplant an Established Tree?

There are a number of reasons why you might need or want to transplant an established tree. Perhaps you’re looking to add some greenery to your property but don’t have the space for a new tree. Or maybe you’ve recently purchased a home and inherited a tree that’s too close to the house for your liking. Whatever the reason, it’s important to understand that transplanting an established tree is a big job. Not only do you have to dig up the tree, but you also have to replant it in a new location and make sure that it has all the necessary nutrients to continue growing and thriving.

Before You Transplant…

Before you even think about transplanting an established tree, there are a few things you need to take into consideration. First of all, how large is the tree? The size of the tree will play a big role in how difficult it will be to transplant. If the tree is small enough, you might be able to move it yourself. However, if it’s larger than 15 feet tall, you’ll probably need to hire a professional tree service to help with the job.

Another thing you need to think about before transplanting an established tree is its root structure. A healthy root system is vital for the successful transplant of any tree, so make sure that the roots are in good shape before proceeding with the move. Once you’ve determined that the roots are healthy and strong enough for transplanting, you can begin digging them up. This is usually done using a Bobcat or other type of excavator equipped with a bucket or teeth attachment.

The Preparation Process

The first step in transplanting an established tree is to assess the tree and its current location. This will help you determine if transplanting the tree is actually feasible. Some factors that you will need to consider include the size of the tree, the type of soil it is currently growing in, and the condition of the roots. Once you have determined that transplanting the tree is indeed possible, you will need to prepare both the tree and its new location.

For the tree itself, you will need to prune back any branches that extend beyond the root ball. This will help make transplanting easier and will also reduce stress on the roots. You should also water the tree well a few days before transplanting to help soften the ground and make digging easier. As for the new location, you will need to dig a hole that is twice as wide as the root ball and just as deep. Once you have done this, you should mix some compost or manure into the hole to help provide nutrients for the roots.

Transplanting an established tree can be a difficult and time-consuming process, but it is definitely possible with the right preparation. By taking the time to assess the tree and its current location, prepare both the tree and its new location, and transplant it carefully, you can ensure that your tree will take well to its new home.

The Benefits of Transplanting an Established Tree

There are a few benefits that come along with transplanting an established tree:

  • Giving the tree a new lease on life: If the tree is struggling in its current location, transplanting it to a new spot can give it the fresh start it needs.
  • Rejuvenation: Established trees can become less vigorous over time. Transplanting can give them the boost they need to start growing vigorously again.
  • Improving the landscape: If you’re not happy with how your landscape looks, transplanting an established tree can be a great way to improve it.

Of course, there are also a few challenges that come along with transplanting an established tree. These challenges include:

  • Finding a new location: If you’re going to transplant an established tree, you need to make sure you have a good location for it. The new location should have rich, friable soil and plenty of room for the roots to spread out.
  • Digging the hole: When you’re transplanting an established tree, you need to dig a hole that’s large enough to accommodate all of the roots. This can be challenging, especially if the roots are spread out far from the trunk of the tree.
  • Watering: Water is essential for any transplanted tree – but it’s especially important for an established tree. Make sure you water your transplanted tree regularly and deeply until it becomes established in its new location.

Conclusion:

Transplanting an established tree may seem like a daunting task, but with a little planning and effort, it can be done! Just remember to take your time; rushing through any part of the process could lead to problems down the road. Now that you know all there is to know about transplanting established trees, what are you waiting for? Get out there and start digging!


from AAA Tree Lopping Ipswich https://ift.tt/fcPz5kC
via IFTTT