Tuesday, May 30, 2023

Choosing the Best Fertilizer for Your Trees An Unbiased Review

Unlocking Tree Health: A Comprehensive and Impartial Review of Fertilizers

Trees are like the engine of your yard, constantly running and providing beauty and shade for your outdoor space. And just like any engine, trees need fuel to keep them going strong. That’s where fertilizer comes in – it’s the fuel that keeps your trees healthy and vibrant.

But with so many different types of fertilizers on the market, it can be overwhelming to choose the right one for your specific tree needs.

Choosing the best fertilizer for your trees is like choosing the right type of gasoline for your car – you want to make sure you’re using a high-quality product that will keep things running smoothly.

With this unbiased review, we’ll help you navigate through all the options out there and find the perfect fertilizer to meet your tree nutrient needs. From understanding what kind of nutrients trees require, to considering factors such as application timing and maintaining healthy trees long-term, we’ve got you covered.

So buckle up and get ready to give your trees the fuel they need to thrive!

Understanding Tree Nutrient Needs

You need to understand what nutrients your trees crave, like a chef who knows the ingredients needed for a perfect dish. Trees need three primary macronutrients: nitrogen, phosphorus, and potassium.

Nitrogen is essential for leaf growth and vibrant green color. Phosphorus is necessary for root development and overall plant health. Potassium helps trees build strong cell walls and resist disease.

However, different types of trees have varying nutrient requirements depending on their species, location, and growing conditions. For example, fruit-bearing trees require more potassium than non-fruit bearing ones because it promotes fruit production.

It’s crucial to identify which nutrients your trees lack so that you can choose the right fertilizer that meets their specific needs. With this knowledge in mind, let’s dive into the different types of fertilizers available on the market today.

Types of Fertilizers

Now let’s take a look at the different types of fertilizers available for your tree’s needs. There are various types of fertilizers, each with its own set of benefits and drawbacks.

Here are the most common types:

  • Organic Fertilizers: Made from natural materials like composted manure, bone meal, or fish emulsion. They release nutrients slowly over time and improve soil health.
  • Inorganic Fertilizers: Also known as chemical fertilizers, these are made from synthetic materials and provide an immediate boost in nutrients to plants. However, they can harm soil health if used excessively.
  • Slow-release Fertilizers: These gradually release nutrients into the soil over several months. They are perfect for trees that require consistent feeding but don’t want to be constantly fertilized.
  • Liquid Fertilizers: Applied through watering cans or sprayers, liquid fertilizers are fast acting and easy to use. They can be organic or inorganic.

Choosing the right fertilizer for your tree requires careful consideration of its nutritional requirements and environmental impact. In the next section, we’ll discuss the pros and cons of each type so you can make an informed decision about which one is best suited for your needs.

Best Fertilizer for Your Trees

Pros and Cons of Different Fertilizers

If you’re looking to maximize your tree’s growth while minimizing negative environmental impact, understanding the pros and cons of each type of fertilizer is crucial.

Organic fertilizers, for example, offer a safer alternative to chemical fertilizers by providing essential nutrients in a slow-release form that minimizes leaching and runoff into nearby water sources. Additionally, organic fertilizers can improve soil health over time by promoting microbial activity and increasing the soil’s ability to retain moisture.

On the other hand, chemical fertilizers can provide quick results but have several downsides. These types of fertilizers contain high concentrations of nitrogen, phosphorus, and potassium that can easily be washed away by rain or irrigation if not absorbed by the plant roots quickly enough. This runoff can lead to pollution in local bodies of water and harm aquatic life. Furthermore, excessive use of chemical fertilizers may also cause long-term damage to soil health by killing off beneficial microorganisms that keep the soil ecosystem balanced.

When choosing a fertilizer for your trees, it’s important to consider not only the benefits but also any potential drawbacks associated with each option. Understanding how different types of fertilizer interact with your tree’s environment will help you make an informed decision about which product will provide optimal growth without causing unintended harm to surrounding ecosystems or long-term damage to soil health.

Factors to Consider When Choosing a Fertilizer

Before making a decision, consider which factors are most important to you when it comes to fertilizing your trees. One key factor is the nutrient content of the fertilizer. Different types of trees require different nutrients, so it’s important to choose a fertilizer that contains the right balance for your specific tree species.

For example, nitrogen is essential for plant growth and green foliage, while phosphorus promotes root development and flowering. Another factor to consider is the release rate of the fertilizer. Slow-release fertilizers provide nutrients gradually over an extended period, while quick-release fertilizers provide a sudden burst of nutrients that may not be sustainable in the long term.

Additionally, organic fertilizers are derived from natural sources and are often more environmentally friendly than synthetic alternatives. As you consider these factors for choosing a fertilizer, keep in mind that application and timing are also crucial elements in promoting healthy tree growth.

Application and Timing

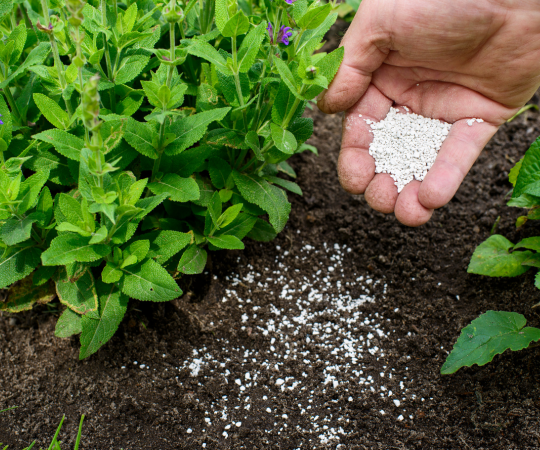
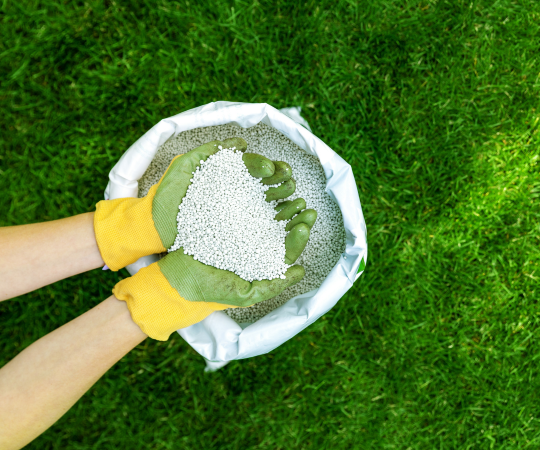
The key to promoting healthy tree growth lies in proper application and timing of fertilizers. Studies have shown that applying fertilizer during the active growing season can increase nutrient absorption by up to 90%. To ensure effective application, it’s important to follow the instructions on the fertilizer package carefully. Here are some tips for applying fertilizer:

  • Spread the fertilizer evenly around the base of the tree.
  • Water the area thoroughly after applying fertilizer.
  • Avoid getting fertilizer on leaves or branches as this can cause damage.
  • Use a slow-release fertilizer for long-lasting results.

By following these tips, you can help your trees get the nutrients they need to thrive.

Maintaining healthy trees requires more than just proper fertilization, however. Let’s explore some other steps you can take to keep your trees in top shape.

Maintaining Healthy Trees

Now that you know how to apply fertilizer and when to do it, let’s talk about the importance of maintaining healthy trees. While fertilizer can certainly help with growth and overall health, it’s not a miracle worker.

There are other factors that play into the success of your trees, such as proper watering, pruning, and pest management.

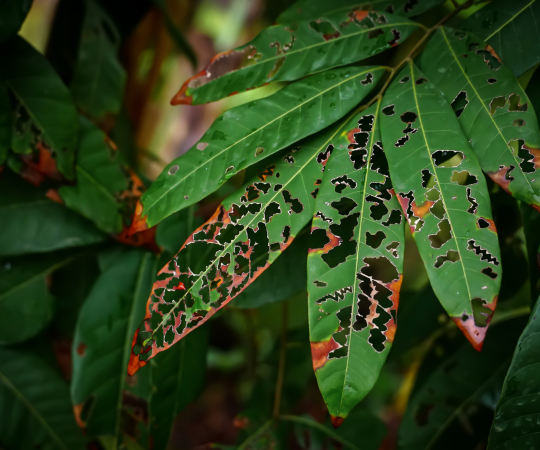
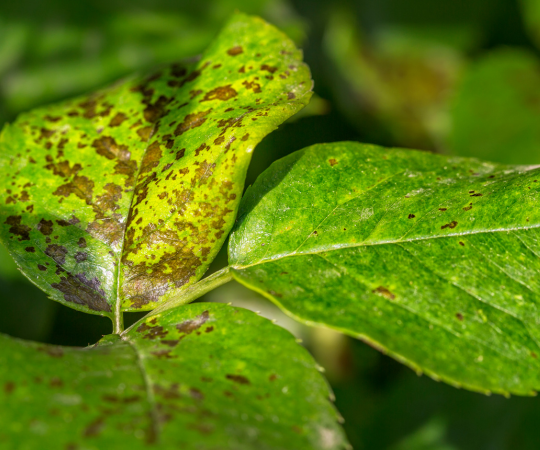
One crucial aspect of tree maintenance is monitoring for signs of stress or disease. This could include discoloration or wilting leaves, abnormal growth patterns, or evidence of insect infestation. Early detection is key in preventing further damage and saving the life of your tree.

Regular inspections by a certified arborist can ensure that any issues are caught early on and resolved before they become severe. In addition to this, providing adequate water during dry periods and removing dead or damaged branches through regular pruning will also help maintain the health and vitality of your trees.

Remember: a healthy tree is better equipped to withstand environmental stresses such as droughts or extreme temperatures.

Best Fertilizer for Your Trees

Frequently Asked Questions

Are there any natural alternatives to chemical fertilizers for trees?

Looking for natural alternatives to chemical fertilizers for your trees? You’re not alone. Luckily, there are plenty of options out there that can provide your trees with the nutrients they need without harming the environment or introducing harmful chemicals into your yard.

One option is compost, which is made from organic matter like leaves, grass clippings, and food scraps.

Another option is manure, which can be sourced from local farms or even your own backyard if you have livestock.

You can also use bone meal or blood meal as a natural source of nitrogen for your trees. Whatever route you choose, just make sure to do your research and follow application instructions carefully to ensure the best results for your beloved trees.

Can fertilizing trees too often actually harm them?

Fertilizing trees too often can actually harm them. In fact, over-fertilization is a common problem that many tree owners face.

Did you know that excessive fertilization can lead to an imbalance in the soil’s nutrients and cause root burn? This means that the roots can become damaged or even die, which ultimately affects the health and growth of the entire tree.

To avoid this issue, it’s important to only fertilize your trees when necessary and to use the appropriate amount based on their specific needs. It’s always best to consult with a professional arborist or horticulturist for guidance on proper fertilizer usage.

How do I know if my tree needs fertilizer?

If you’re wondering if your tree needs fertilizer, there are a few things to consider. First, look at the overall health of the tree. If it’s growing well and has vibrant leaves or needles, it may not need additional nutrients.

However, if the tree appears stunted or has yellowing leaves, it could benefit from fertilizer. Factors such as soil quality and environmental stressors can impact a tree’s nutrient uptake and make fertilization necessary.

Consider having a soil test done to determine what type of fertilizer would be most beneficial for your specific tree species and location. Overall, paying attention to your tree’s health and being proactive about fertilization can help ensure its long-term success.

What is the best way to apply fertilizer to my trees?

You’ve determined that your trees need fertilizer, but now you’re wondering how to apply it.

The best way to apply fertilizer to your trees depends on the type of fertilizer you’re using and the size of your trees.

For granular fertilizers, simply sprinkle the recommended amount around the base of each tree and water it in.

For liquid fertilizers, mix the recommended amount with water and use a watering can or hose attachment to distribute it evenly around each tree’s drip line.

Remember not to over-fertilize, as this can harm your trees more than help them. As they say, “less is more” when it comes to fertilizing your trees.

What are the long-term effects of using certain types of fertilizers on the environment?

When it comes to the long-term effects of using certain types of fertilizers on the environment, there are a few key things to keep in mind.

First and foremost, it’s important to remember that not all fertilizers are created equal. Some contain chemicals that can be harmful to both plants and animals over time, while others are more natural and sustainable.

Additionally, the way in which you apply your fertilizer can also have an impact on the environment. For example, if you’re applying too much fertilizer or not properly managing runoff, it could lead to pollution of nearby waterways.

Ultimately, choosing the right fertilizer for your trees is about finding a balance between what’s best for your plants and what’s best for the environment as a whole.

Conclusion

Congratulations on making it to the end of this guide! You now have a solid understanding of the different types of fertilizers available and how to choose the best one for your trees.

Remember, it’s important to consider factors such as soil type, tree species, and nutrient deficiencies before selecting a fertilizer. One thing to keep in mind is that choosing the right fertilizer is like finding the perfect pair of shoes.

Just like how you wouldn’t wear high heels to go hiking or running shoes to a formal event, you need to select a fertilizer that suits your tree’s specific needs. By doing so, you’ll be able to provide your trees with the nutrients they need for healthy growth and development.

So go ahead and grab your gardening gloves – it’s time to put your newfound knowledge into action! With some careful consideration and proper application techniques, you’ll be well on your way towards maintaining beautiful and healthy trees in no time.

Happy planting!

Related Source

The 10 Very Best Fertilizers for Houseplants


from AAA Tree Lopping Ipswich https://ift.tt/nz2qXWt
via IFTTT

Your Ultimate Tree Fertilization Calendar When and How to Feed Your Leafy Friends

Your Ultimate Tree Fertilization Calendar: When And How To Feed Your Leafy Friends”

Are you a proud tree owner who wants to ensure that your leafy friends stay healthy and vibrant all year round?

One essential aspect of tree care is fertilization, which provides the necessary nutrients for trees to grow strong and resilient. To achieve optimal growth, it’s crucial to develop a customized fertilization plan that considers factors such as soil type, climate conditions, and the specific needs of each tree species.

In this article, you’ll learn everything you need to know about fertilizing your trees, from understanding the basics of tree nutrition to determining the best time and method for applying fertilizers.

We’ll also cover common mistakes to avoid when fertilizing your trees and provide practical tips for developing a customized fertilization plan that suits your unique needs.

By following our ultimate tree fertilization calendar, you can rest assured that your leafy friends will thrive throughout the seasons.

Understanding the Basics of Tree Fertilization

You’re going to love learning about the basics of giving your trees the nourishment they need to thrive. Fertilization is an essential part of tree care, and it can make a big difference in the health and growth of your leafy friends.

Trees require nutrients such as nitrogen, phosphorus, and potassium, which aren’t always readily available in their surrounding soil. Fertilizing provides these much-needed elements in the right amounts to promote growth and maintain overall health.

There are many different types of fertilizers available on the market, but they all contain varying amounts of nutrients. Before choosing a fertilizer for your trees, you should conduct a soil test to determine what type of nutrients your soil is lacking. This will help you choose a fertilizer that meets those specific needs.

Determining the best time to fertilize also plays an important role in ensuring that your trees receive maximum benefits from their feeding schedule.

Determining the Best Time to Fertilize

As you plan the growth of your garden, it’s important to consider when to nourish the soil so that it can produce bountiful and healthy crops. For trees, timing is everything when it comes to fertilization. The best time to apply fertilizer depends on several factors such as tree species, age, climate, and soil type.

For deciduous trees, the ideal time for fertilization is during late fall or early spring before new growth starts. This allows the nutrients to penetrate deep into the soil and reach the roots for maximum absorption. On the other hand, evergreen trees should be fertilized in early spring before new growth appears.

Keep in mind that over-fertilizing can cause more harm than good, so always follow label instructions and avoid applying fertilizer during periods of drought or extreme temperatures. With proper timing and application techniques, your leafy friends will thrive with a healthy boost of nutrients.

Transitioning into our next section about ‘applying fertilizers correctly’, let’s take a closer look at how you can ensure optimum nutrient uptake for your trees without causing harm to them.

Applying Fertilizers Correctly

Get the most out of your fertilizer by learning how to apply it correctly without harming your trees.

First, make sure to spread the fertilizer evenly around the tree’s drip line, which is where the branches end and water drips down to the ground. This ensures that all parts of the tree receive equal amounts of nutrients.

Second, avoid getting fertilizer on any part of the tree above ground level, including leaves and bark, because it can cause damage or even burn them.

Lastly, water thoroughly after applying fertilizer to help it penetrate deep into the soil where roots absorb nutrients.

Applying fertilizers correctly is crucial for promoting healthy growth in your trees. By following these three simple steps, you can ensure that your trees get all the necessary nutrients they need without causing harm or damage: spread evenly around drip line, avoid getting on visible parts above ground level, and water thoroughly after application.

In order to achieve optimal results from fertilization efforts, it’s important to also be aware of common mistakes people often make when applying fertilizers – we’ll discuss these in detail next.

Common Mistakes to Avoid

If you want to make sure your trees are getting the most out of their fertilizers, it’s important to avoid these common mistakes.

One of the biggest mistakes is over-fertilizing. While it may seem like more fertilizer would lead to more growth, too much can actually harm the tree by burning its roots and causing excessive leaf growth at the expense of root development.

Another mistake is using the wrong type of fertilizer. Different trees have different nutrient requirements, and using a one-size-fits-all approach can lead to imbalances or deficiencies in nutrients needed for healthy growth.

Additionally, applying fertilizers at the wrong time can also be detrimental. For example, applying nitrogen-based fertilizers during drought conditions can promote new leaf growth that will require more water than the tree is able to absorb, leading to stress and potential damage.

To get the most benefit from your fertilization efforts, it’s essential to develop a customized plan based on your specific tree species and current growing conditions.

By developing a customized fertilization plan, you’ll be able to ensure that your trees are receiving exactly what they need at the right times throughout the year. This will help them grow strong roots, produce vibrant foliage and flowers or fruit as appropriate for their species, and resist pests and diseases better than if you were just guessing or following generic guidelines without considering each tree’s individual needs.

Developing a Customized Fertilization Plan

Let’s craft a personalized fertilizer plan for your trees to ensure they receive the exact nutrients they need at the appropriate times throughout the year, maximizing their growth potential.

First, identify the species of tree you have and research its specific nutrient requirements. This will allow you to tailor your fertilization plan accordingly and avoid over- or under-fertilizing.

Second, consider factors such as soil type, climate, and age of the tree when determining its fertilizer needs. For example, younger trees require more nitrogen than older ones.

Third, decide on the type of fertilizer you will use based on your tree’s specific needs and preferences. Organic fertilizers are a great option for those looking for an environmentally friendly choice that also releases nutrients slowly over time. Synthetic fertilizers tend to be more concentrated with nutrients but can lead to run-off if not applied correctly.

By taking these three steps into account while developing your personalized fertilizer plan, you’ll set yourself up for success in growing healthy and robust trees throughout the year.

With this in mind, let’s move on to monitoring and adapting your fertilization plan as necessary to ensure continued growth and health for your leafy friends.

Monitoring and Adapting Your Fertilization Plan

Now that you’ve developed a customized fertilization plan for your trees, it’s important to monitor and adapt it as needed.

Tracking the growth and health of your trees is key to ensuring they receive the right amount of nutrients at the right time.

By adjusting fertilizer amounts and timing based on these observations, you can maximize their growth potential.

And if any problems or concerns arise, addressing them promptly can prevent further damage and maintain optimal tree health.

Tracking Growth and Health

Keep an eye on how your trees are growing and their overall health to ensure they’re receiving the proper care and nourishment they need.

Observe the color, size, and shape of leaves, as well as any signs of disease or pests. Check for any dead branches or areas where growth seems stunted.

By tracking these factors, you can determine if your fertilization plan is working effectively or if adjustments need to be made.

In addition to visual observations, consider conducting soil tests periodically to assess nutrient levels and pH balance. This information can help guide your fertilization schedule and ensure that your trees are receiving the appropriate nutrients in the right amounts.

With careful monitoring and attention to detail, you can keep your leafy friends healthy and thriving for years to come. It’s important to also consider adjusting fertilizer amounts and timing based on your observations.

Adjusting Fertilizer Amounts and Timing

So, you thought you had it all figured out with your fertilizer plan, but surprise! Your trees aren’t responding as expected. Don’t panic – it’s time to adjust the amounts and timing of your application based on the observations you’ve made about their growth and health.

If your trees are showing signs of nutrient deficiencies or excesses, it may be time to increase or decrease the amount of fertilizer you’re applying. You can also try adjusting the frequency of applications, spacing them out more if your trees seem overwhelmed by too much at once.

It’s important to remember that different trees have different needs when it comes to nutrients, so don’t be afraid to experiment with different amounts and timings until you find what works best for each one. Keep track of any changes you make and how they affect growth and health over time.

With a little patience and attention to detail, you’ll soon find yourself with healthy, thriving leafy friends in no time!

Now that we’ve covered adjusting fertilizer amounts and timing, let’s move on to addressing problems and concerns with your tree fertilization plan.

Addressing Problems and Concerns

If you’re experiencing issues with your tree’s growth or health, it’s time to take a closer look at potential problems and concerns that may be affecting your fertilizer plan.

One common issue is over-fertilization, which can lead to excessive growth or even burn the roots of the tree. To avoid this problem, make sure to follow the recommended amount of fertilizer for your specific type of tree.

Another concern is under-fertilization, which can result in stunted growth and a lack of nutrients for the tree. If you notice yellowing leaves or slow growth, it may be time to adjust your fertilization schedule or increase the amount of fertilizer used.

Additionally, keep an eye out for pests and diseases that can also affect the health of your trees.

By addressing these problems and concerns, you can ensure that your leafy friends receive all the necessary nutrients for optimal growth and health.

Frequently Asked Questions

Can you use any type of fertilizer on any tree, or are there specific types for specific trees?

You might be wondering if any type of fertilizer can be used on any tree or if specific types are needed. The truth is, while some fertilizers may work well on one type of tree, they may not be as effective on another.

This is because different trees have different nutrient requirements and soil conditions that need to be taken into consideration when selecting the right fertilizer. For example, fruit trees require more potassium than nitrogen, while conifers prefer acidic soils and therefore need a fertilizer with a higher sulfur content.

So, it’s important to choose the right type of fertilizer tailored to your tree’s needs to ensure optimal growth and health.

How often should you test the soil to determine the tree’s nutrient needs?

To determine the nutrient needs of your trees, it’s recommended to test the soil at least once a year. Soil tests will reveal the pH level, nutrient deficiencies and excesses, as well as other factors that can impact tree growth.

The frequency of testing may vary depending on location, soil type, weather conditions, and tree species. For example, trees in sandy soils or those growing in areas with heavy rainfall may require more frequent testing than those in clay soils or areas with low precipitation.

By monitoring and adjusting the nutrients provided to your trees based on soil test results, you can optimize their growth and health for years to come.

Is it safe to use chemical fertilizers around children and pets?

Using chemical fertilizers around children and pets may seem like a concern at first, but it can be safe with proper precautions and responsible use. Always follow the instructions on the label carefully and keep children and pets away from treated areas until the product has been fully absorbed or washed away by rainfall.

Additionally, consider using organic alternatives that are safer for both your family and the environment. Ultimately, it’s important to weigh the benefits of fertilizing your trees against any potential risks and make an informed decision based on your specific situation.

How long does it take for a tree to show the effects of fertilization?

When it comes to fertilizing trees, you may wonder how long it takes for the effects of fertilization to become apparent. The answer to this question can vary based on several factors such as the species of tree, soil conditions, and type of fertilizer used.

In general, it can take anywhere from a few weeks to a few months before you start seeing the results of your efforts. Keep in mind that patience is key when it comes to tree care and that consistent fertilization over time will ultimately lead to healthier and stronger trees.

Are there any natural alternatives to commercial fertilizers that can be used on trees?

You may think that commercial fertilizers are the only way to keep your trees healthy and vibrant, but there are actually several natural alternatives available.

From compost and manure to bone meal and seaweed extract, these organic options provide essential nutrients without the harmful chemicals found in synthetic fertilizers.

Not only are they better for the environment, but they also promote healthy soil and microbial activity, leading to stronger root systems and improved overall tree health.

So before you reach for that bag of chemical fertilizer, consider giving some of these natural alternatives a try – your leafy friends will thank you!

Conclusion

Congratulations, you now have the ultimate tree fertilization calendar! By understanding the basics of tree fertilization, determining the best time to fertilize, and applying fertilizers correctly, you can ensure that your leafy friends are well-fed and healthy all year round.

Remember to avoid common mistakes like over-fertilizing or using the wrong type of fertilizer.

Developing a customized fertilization plan for your specific trees is key. Consider factors such as age, species, and soil conditions when creating your plan. And don’t forget to monitor and adapt as needed throughout the year.

As they say, “you can’t judge a book by its cover,” so take care of your trees from the roots up – they’ll thank you with strong growth and bountiful foliage.

Related Source

When To Fertilize Plants: Best Times For Application Of Fertilizer


from AAA Tree Lopping Ipswich https://ift.tt/hOmnIH4
via IFTTT

The AZ of Tree Removal Understanding Costs Permits and Safety Measures

Mastering Tree Removal: Unlocking Insights on Pricing, Permits, and Ensuring Safety

If you’re considering removing a tree from your property, there are several important factors to consider. From the costs associated with tree removal to the permits required and potential safety risks, it’s essential to have a thorough understanding of the process before you get started.

In this article, we’ll take you through the A-Z of tree removal so you can make an informed decision about whether or not it’s the right choice for your property. We’ll cover everything from assessing potential risks and choosing the right service to preparing for the removal process and post-removal maintenance.

By the end of this article, you’ll have a comprehensive understanding of what’s involved in tree removal and be better equipped to make an informed decision about whether or not it’s right for your needs.

Understand the Costs Associated with Tree Removal

You’re probably wondering how much it’s going to cost you to get rid of that eyesore in your yard. Well, let us tell you – there are a lot of factors that go into the pricing of tree removal services!

Firstly, the size and height of the tree will play a significant role in determining the cost. The larger and taller the tree, the more expensive it will be to remove. Additionally, if there are any obstacles such as power lines or buildings near the tree, this can also increase the price. The location of your property may also affect costs since some companies charge extra for travel time.

Another factor affecting cost is whether or not you want stump removal as well. Stump removal is an additional service that often comes at an extra cost because it requires specialized equipment and skills. Lastly, keep in mind that different companies have different pricing structures and rates, so make sure to shop around before deciding on one.

Understanding permit requirements is crucial when it comes to removing trees from your property safely and legally.

Know the Permits Required for Tree Removal

In order to avoid legal issues, it’s important for you to know the permits required for tree removal. Local and state regulations dictate what kind of trees can be removed and under what circumstances. Obtaining these permits involves following specific procedures, which we will explain in detail.

Adjust the paragraph structure in the Input to logically group complete sentences on their own lines, with a double new line after. Use contractions.

Local and State Regulations

Before starting any work, it’s essential to be aware of the regulations and rules set by your state and local government. These regulations are put in place to ensure that tree removal is done safely and responsibly. Here are some important things you should know about local and state regulations regarding tree removal:

  1. Different states may have different laws or ordinances when it comes to tree removal. Some states require a permit for removing trees on private property, while others do not.
  2. Local governments may also have their own specific guidelines for tree removal, such as which types of trees can be removed and where they can be disposed of.
  3. Violating these regulations can result in fines or even legal action, so it’s crucial to understand what is required before beginning any tree removal project.

Knowing the local and state regulations regarding tree removal is an essential step in obtaining the necessary permits for your project. By understanding these guidelines, you can ensure that your project complies with all relevant laws and ordinances, minimizing the risk of fines or other penalties down the line.

How to Obtain Permits

To make sure you can get started on your tree removal project without any legal issues, it’s important to know how to obtain the necessary permits.

First, research the local regulations and requirements for tree removal permits in your area. Depending on where you live, there may be different types of permits required based on factors such as the size of the tree or whether it is located on public or private property.

Once you have a clear understanding of what type of permit(s) are needed, contact your city or county government office responsible for issuing permits. They’ll provide you with an application form that needs to be filled out and submitted along with any supporting documentation such as photos, site plans, and proof of insurance.

Make sure to submit your application well before starting any work so that you have enough time to receive approval and avoid potential fines or legal issues.

With your permit(s) in hand, you can move onto assessing potential safety risks associated with removing the tree.

Without proper assessment and precautions in place, removing a tree can be extremely dangerous for both yourself and anyone nearby.

Assess Potential Safety Risks

Assessing potential risks is crucial when it comes to removing trees, as accidents can happen even to the most experienced professionals. It’s important to note that over 100 tree care workers die annually due to job-related injuries.

This is why before starting any tree removal project, you should assess the potential safety risks in the area. Start by identifying any obstacles or hazards that may be present nearby such as power lines, buildings, fences, or other large trees. These obstacles can make the task more challenging and increase the risk of injury or damage.

Additionally, consider the overall condition of the tree itself – if it’s leaning towards a structure or has large branches hanging over a roadway, special precautions will need to be taken during removal. By assessing these factors beforehand and taking proper precautions, you can minimize risk and ensure a safe removal process.

When it comes to choosing the right tree removal service for your needs, there are several factors to consider.

Choose the Right Tree Removal Service

When it comes to choosing the right tree removal service, there are a couple of key points that you should keep in mind.

Firstly, take the time to research different companies and compare their rates and services.

Secondly, don’t be afraid to ask for references from previous customers so that you can get an idea of their level of expertise and professionalism.

By being methodical and thorough in your approach, you can ensure that you choose a tree removal service that meets all of your needs and provides top-notch service.

Researching Companies

Researching companies can help you find a reliable tree removal service that fits your needs and budget. When looking for a company, consider the following:

  • Reputation: Check online reviews and ratings to see what others have experienced with the company.
  • Experience: Look for a company with years of experience in tree removal services. This ensures that they have the knowledge and skills necessary to handle different types of trees and situations.
  • License and insurance: It’s important to hire a company that’s licensed and insured to protect yourself from liability in case of accidents or damages.

By taking these factors into consideration, you can narrow down your options to find the best tree removal service for your needs.

Once you’ve found some potential companies, it’s time to ask for references. Asking for references can give you an idea of how previous customers felt about their experience with the company.

Asking for References

Now that you’ve narrowed down your options, it’s time to ask for references and hear from previous customers about their experience with the company.

Ask the tree removal company for a list of references, and make sure to follow up with them. It’s important to gather as much information as possible about the company before making a final decision.

When speaking with references, ask about their overall satisfaction with the job, as well as any specific concerns or issues that arose during the process. You can also inquire about safety measures taken by the crew and how they handled any unexpected situations.

Gathering this information will help you make an informed decision and ensure a smooth tree removal process.

As you prepare for the tree removal process, there are several key steps to take in order to ensure safety and efficiency.

Prepare for the Tree Removal Process

Get ready to dive into the nitty-gritty of getting rid of those leafy giants and learn how to smoothly sail through the process. Before you embark on this journey, make sure you’re well-prepared by taking note of these four important steps:

  1. Clear the area: Tree removal can be a messy business, so it’s crucial that you clear the area around the tree before work begins. This means removing any furniture, toys, or other items that could obstruct or damage equipment.
  2. Notify your neighbors: If your tree is close to a neighbor’s property, it’s important to let them know about your plans for removal. Not only is this considerate, but it also gives them a chance to prepare for any noise or disruption.
  3. Check for underground utilities: Before any digging begins, call 811 and have all underground utilities marked out on your property. This will prevent accidents and ensure that work can proceed safely.
  4. Arrange for debris removal: Once the tree has been removed, there will be plenty of debris left behind. Make sure you’ve arranged for its disposal ahead of time so that your yard doesn’t become an eyesore.

Now that you’re fully prepared for the tree removal process, it’s time to turn your attention to post-removal maintenance…

Post-Removal Maintenance

Now that you’ve successfully completed the tree removal process, it’s time to focus on post-removal maintenance.

This includes stump removal, planting new trees, and proper disposal of debris.

Stump removal is important not only for aesthetic reasons but also to prevent potential hazards such as tripping or attracting pests.

Planting new trees can help fill in any gaps left by the removed tree while improving air quality and providing shade.

Proper disposal of debris is crucial for maintaining a clean and safe environment.

Stump Removal

If you’ve ever had a tree cut down, you know that getting rid of the stump can be just as important and sometimes just as difficult. Stumps left behind after tree removal pose safety hazards and can attract pests like termites and rodents into your property. Not to mention, they can also be an eyesore in your otherwise beautiful lawn.

Stump removal requires specialized equipment and expertise. Depending on the size of the stump, it may require grinding or excavation with heavy machinery. It’s important to hire a professional who knows how to safely remove stumps without damaging surrounding structures or landscaping.

Once the stump is removed, you’ll have a clean slate for planting new trees or other vegetation to enhance your outdoor space.

Planting New Trees

Planting new trees can be a great way to enhance the beauty and functionality of your outdoor space, and it’s important to have the right knowledge and tools to ensure their successful growth.

Here are some tips for planting new trees:

  1. Choose the right tree species for your area: Different trees thrive in different climates, so make sure you choose a species that is suitable for your local climate conditions.
  2. Pick a good location: Trees need sunlight, water, and nutrients to grow properly, so choose a spot with good drainage and enough sunlight throughout the day.
  3. Prepare the soil: Loosen up the soil around where you’ll plant the tree using a shovel or garden fork. If necessary, add compost or organic matter to improve soil quality.
  4. Water regularly: Newly planted trees need plenty of water during their first few years of growth to establish their root systems.

Now that you know how to plant new trees successfully, it’s important to also consider proper disposal of debris when removing old ones.

Proper Disposal of Debris

Don’t be a lazy, careless homeowner – dispose of your debris properly to prevent environmental damage and keep your community looking great!

After tree removal, you’ll likely have a lot of debris on your hands. It’s important to properly dispose of this debris to protect the environment and comply with local regulations.

First, consider hiring a professional disposal service. They can safely remove and transport the debris to an appropriate location for disposal or recycling.

If you decide to handle it yourself, make sure you separate the different types of debris (branches, trunks, leaves) and find out where they can be disposed of in your area. Some cities have designated facilities for yard waste while others may require special permits or arrangements for disposal.

Regardless of how you choose to dispose of the debris, always do so responsibly and ethically.

Frequently Asked Questions

What happens to the wood and debris left behind after the tree is removed?

After a tree is removed, the wood and debris left behind can be repurposed in a number of ways. Small branches and twigs can be turned into mulch which can then be used as fertilizer or ground cover for gardens.

Larger pieces of wood can be cut into firewood and used to heat homes during the winter months. If the tree was diseased, it’s important to dispose of the wood properly to prevent further spread of the disease.

Some municipalities offer curbside pickup of yard waste while others require residents to bring their own waste to designated sites. It’s important to research your local regulations regarding disposal before beginning any tree removal project.

Can the roots of the tree be removed as well, and is this included in the cost of removal?

Removing a tree is not just about cutting it down. If you want to remove the roots as well, expect to pay extra for that service. Removing the roots requires specialized equipment and expertise since they can extend deep into the ground and spread out far from the trunk.

Think of it like pulling out a weed – if you only cut off the visible portion above ground, it will likely grow back again. However, unlike weeds, tree roots can cause damage to your property’s foundation or underground utilities if left unchecked.

Make sure to discuss root removal with your tree removal service provider before scheduling the job, so there are no surprises when it comes time to pay.

Are there any alternatives to tree removal, such as trimming or pruning, that could save me money?

If you’re looking to save money on tree maintenance, there are alternatives to removal that may be suitable for your situation. Trimming and pruning can help maintain the health of a tree while also reducing its size or shape. This is often a more cost-effective solution than full removal, as it requires less labor and equipment.

However, it’s important to note that trimming or pruning should only be done by professionals with experience in proper techniques and safety measures. Additionally, regular maintenance such as fertilization and pest control can prevent the need for drastic action in the future.

Overall, consider all options before deciding on tree removal to ensure you’re making the best decision for your budget and property.

How long does the tree removal process typically take, and will it disrupt my daily routine?

Picture this: the towering tree in your yard, once a symbol of beauty and life, now poses a threat to your safety and property. You’ve decided that it’s time for removal, but you’re worried about how long the process will take and how much it will disrupt your daily routine.

The truth is, every job is unique and therefore requires different timelines. Factors like tree size, location, and complexity of the project all play a role in determining the length of time required for removal. However, a professional arborist can provide an estimate based on their expertise and experience.

Rest assured that while there may be some disruption to your daily routine during the process, a reputable company will work with you to minimize any inconvenience as much as possible.

What happens if the tree removal service damages my property during the removal process?

If the tree removal service damages your property during the process, you have options for recourse. First, make sure that the company you hire has liability insurance to cover any damages they may cause.

If damage does occur, document it with photos and notify the company immediately. Most companies will work with you to resolve any issues and cover repair costs. In extreme cases where a resolution cannot be reached, legal action may be necessary.

It’s important to do your research and choose a reputable tree removal service to minimize the risk of property damage in the first place.

Conclusion

Congratulations on reaching the end of this comprehensive guide to tree removal! By now, you should have a good understanding of the costs involved, permits required, safety measures to consider, and how to choose the right service for your needs.

But before you take action and remove that unwanted tree from your property, there may be one objection lingering in your mind: “Why bother removing it at all?”

You might think that leaving a dead or dying tree alone won’t cause any harm. However, failing to remove it can lead to potential safety hazards such as falling branches or even an entire tree collapsing on your property. Additionally, leaving a decaying tree can attract pests like termites and other insects which can spread throughout your yard or even into nearby structures.

In conclusion, while it may seem easier to leave trees untouched rather than dealing with the hassle of removal, taking care of them is essential for maintaining both the aesthetics and safety of your home. Remember to always prioritize safety first by assessing risks and choosing a reputable professional service for any necessary removals.

With these tips in mind, you’ll be well-equipped to make informed decisions about managing trees on your property.

Related Source

5 Useful Tips for Safe & Efficient Tree Removal


from AAA Tree Lopping Ipswich https://ift.tt/PxKwg5F
via IFTTT

Monday, May 29, 2023

DIY Tree Removal An Indepth Safety Guide for the Adventurous Homeowner

Taking Control Safely: An In-Depth DIY Tree Removal Safety Guide

Are you the type of homeowner who loves taking on DIY projects around your property? Have you noticed a tree on your land that needs to be removed, and you’re thinking about tackling the job yourself? Before grabbing your chainsaw and getting to work, it’s crucial to understand the safety risks involved with DIY tree removal.

In this in-depth safety guide, we’ll walk you through all the necessary steps for safely removing a tree from your property. From assessing whether it’s safe to remove the tree yourself to gathering the right equipment and preparing your work area, we’ll cover everything you need to know.

By following our tips and guidelines, you can feel confident in tackling this project while keeping yourself and those around you safe. So let’s get started!

Assess the Tree and Determine if DIY Removal is Safe

Before deciding whether it’s feasible to tackle the task of tree removal yourself, take a good look at the condition and location of the arboreal obstacle. First, assess the tree’s health and any potential hazards that may come with cutting it down. For example, is the tree leaning towards your house or power lines? Is there damage or rot in the trunk or branches?

If you’re unsure about any of these factors, it may be best to consult with a professional arborist who can provide guidance on how to safely remove the tree. Next, consider your own experience and capability for completing this job. Removing a tree requires physical strength, specialized equipment, and knowledge of proper techniques.

If you don’t feel confident in your ability to handle all aspects of this task safely, it’s better to err on the side of caution and hire a professional. However, if you’ve determined that DIY removal is possible and have made safety your top priority, then gather the necessary equipment for taking down your unwanted flora.

Gather the Necessary Equipment

You’ll need some tools and gear to get started, like a lumberjack gathering his trusty axe before heading into the woods. Here’s what you’ll need:

  1. Chainsaw – A chainsaw is essential for removing branches and cutting the trunk into manageable pieces.
  2. Safety Gear – Protect yourself with gloves, goggles, ear protection, and a hard hat.
  3. Ladder – Depending on the height of the tree, you may need a ladder to reach certain parts of the tree.
  4. Rope and Pulleys – These will assist in safely lowering large limbs or sections of the trunk.

It’s important to gather all necessary equipment before starting your DIY tree removal project to ensure that you have everything you need for a safe and successful job.

Once you have all your tools ready, it’s time to prepare the work area by clearing debris and establishing safe zones for felling branches or sections of the tree.

Prepare the Work Area

Before you start the tree removal process, it’s important to prepare the work area. This involves clearing the area of debris and obstacles, securing the tree and surrounding structures, and marking a safe escape route.

To ensure your safety and minimize risks, take these steps seriously and make sure that everything is in order before you begin. By doing so, you’ll be able to proceed with confidence knowing that you’ve taken all necessary precautions.

Clear the Area of Debris and Obstacles

Make sure you’ve cleared away any debris or obstacles from the area where you’ll be cutting down your tree to ensure a safe and unobstructed work space. This includes removing any rocks, branches, plants, or other materials that could get in the way of your equipment or cause tripping hazards. Keep in mind that even small objects can become dangerous projectiles if they’re hit by falling limbs or trunks.

As you clear the area, take note of any structures that may be impacted by the falling tree. Make sure there’s enough clearance for the tree to fall without hitting anything important such as power lines, buildings, vehicles, fences, or landscaping features.

Once you have created a clear and safe work zone around your tree, it’s time to move on to securing both the tree and surrounding structures before making any cuts.

Secure the Tree and Surrounding Structures

Now it’s time for you to ensure the safety of both the tree and surrounding structures by properly securing them before beginning any cutting, so you can feel confident and in control as you tackle this task.

Here are some steps to follow:

  1. Tie a rope around the trunk of the tree, making sure it’s tight enough to prevent any movement during cutting.
  2. Check for any nearby power lines or other structures that could be damaged by falling branches or trees, and take measures to protect them.
  3. Use wedges or braces to support weak or leaning limbs before removing them.
  4. Clear away any debris from the base of the tree to provide a safe workspace.

By taking these precautions, you can reduce the risk of injury and damage while completing your DIY tree removal project.

Now that you’ve secured your work area, let’s move on to marking a safe escape route in case of emergency.

Mark a Safe Escape Route

As you prepare to cut down the tree, it’s crucial that you mark a safe escape route in case of an emergency. Did you know that falls are one of the leading causes of injury and death in the home, according to the National Safety Council?

Therefore, before making any cuts, take a few moments to carefully consider your surroundings. Look for any potential hazards such as power lines or other trees that may obstruct your path. It’s essential to have at least two escape routes planned out in advance, just in case one becomes blocked during the removal process.

Once you’ve identified your safe escape route(s), mark them clearly with brightly colored tape or flags. This will help ensure that everyone involved in the project is aware of where they need to go if an emergency arises. Remember to also let those around you know about your plan so that they can be prepared as well.

With this precautionary measure taken care of, it’s time to move on to making the cuts and removing the tree safely and efficiently.

Make the Cuts

Now that you’ve prepared the work area, it’s time to make the cuts. To ensure safety and efficiency, it’s important to plan the sequence of cuts beforehand.

Start by making the first cut at the base of the tree using a technique that will allow for safe and precise removal.

As you move onto limbing and topping, be sure to use correct techniques in order to avoid injury or damage to surrounding property.

Plan the Sequence of Cuts

Start planning the order of cuts for taking down a tree, visualizing each step in your mind to ensure a safe and effective removal process.

First, identify the natural lean of the tree and determine the direction you want it to fall. This will dictate where you make your cuts.

Next, plan out any potential obstacles or hazards that could interfere with the falling tree such as power lines or nearby structures. Make sure to mark these areas clearly so everyone involved is aware of their location.

After considering the direction and potential hazards, it’s time to plan your sequence of cuts. Start by making a horizontal cut on the side of the tree facing in your desired direction of fall. This cut should be made at waist height or slightly higher and should extend about 1/3 into the diameter of the trunk.

Then move to make a second cut directly opposite this first one, creating an open notch in which to guide the falling tree. With these initial cuts made, you can then proceed with removing more wood from behind these cuts until there is only small uncut section remaining at the back of your notch.

Now that you’ve planned out your sequence of cuts, it’s time to start taking action with making that first cut at the base of the tree!

Make the First Cut at the Base of the Tree

You’re not a lumberjack, but you can make the first cut at the base of the tree with ease. Feel like a pro as you wield your trusty saw and get ready to bring that tree down! To ensure safety and efficiency, follow these steps:

  1. Determine which direction you want the tree to fall and clear any obstacles in that path.
  2. Make a horizontal cut into the trunk on that side, about one-third of the way through.
  3. Next, make an angled cut downward from above the horizontal cut until it meets it.

Once completed, stand back and let gravity do its job as the tree starts to fall in your planned direction. Remember to always wear protective gear when operating any cutting tool.

Now that your tree is starting to come down, it’s time for limbing and topping. Use the correct technique for this process by following our next set of guidelines.

Use the Correct Technique for Limbing and Topping

Get ready to feel like a pro as you use the correct technique for limbing and topping your tree. This process involves removing branches from the trunk and cutting the top section of the tree.

First, start by removing any small branches that are less than three inches in diameter. Use your chainsaw to cut these branches at an angle, about one-third of the way through, then make another cut from above until it falls away cleanly.

As you move up to larger branches, use a different technique called ‘topping.’ With this method, make a cut on the underside of the branch about 18 inches away from where it connects to the trunk. Then, saw through about two-thirds of the branch from above before making a final cut on the underside to remove it completely.

Remember to always work with gravity and avoid reaching overhead or cutting too close to yourself.

Now that you’ve mastered limbing and topping, it’s time to remove the tree safely without causing damage or injury.

(Note: The subsequent section will cover how to remove a tree.)

Remove the Tree

Now that you’ve made the necessary cuts on your tree, it’s time to remove it.

This involves cutting the tree into manageable sections so that you can safely move them out of the way. To do this, use a chainsaw and make sure to cut at an angle, directing the fall away from anything nearby. Use ropes to control the falling sections and ensure they don’t cause any damage or harm.

Once all sections are down, dispose of the tree properly by either recycling it or hiring a professional service to haul it away for you.

Cut the Tree into Manageable Sections

Like a skilled chef slicing a ripe avocado, smoothly and deliberately cutting the tree into manageable sections requires patience and precision. First, make sure you have all the necessary tools, such as a chainsaw, hand saws, wedges, and protective gear.

Begin by making an initial cut on the underside of the branch or trunk facing away from you. Then, make another cut on the top side of the branch or trunk closer to your body. This will create a notch that will guide where the tree falls.

Next, continue making cuts on each section of the tree until it is completely separated into smaller parts. Remember to always maintain a safe distance from any falling branches or trunks and never work alone. If there are any difficult sections that require additional support while cutting, use wedges to prevent pinching or binding of your saw blade.

With each successful cut made, you are one step closer to safely removing your tree. As you finish cutting your tree into manageable sections, it’s important to consider how you will control their fall when they come down. Use ropes tied securely around each piece to direct its landing spot and avoid causing damage to property or people nearby.

Use Ropes to Control the Falling Sections

Controlling the landing spot of each section is crucial during tree removal, so be sure to use ropes securely tied around them. The ropes will allow you to guide the falling sections in a specific direction, away from any potential hazards like your house or power lines. Additionally, using ropes can help prevent the sections from causing damage to surrounding trees or vegetation.

To effectively use ropes during tree removal, it’s important to understand how they work. Tie one end of the rope around the tree trunk above where you plan to make your cut and secure it tightly with a knot or hitch. Then, run the other end of the rope over a sturdy branch high above the cutting zone and back down to someone on the ground who can control its tension. With this setup, you’ll have more control over where each section falls and reduce your risk of accidents.

Controlling where each section falls is only one part of safe DIY tree removal. Once you’ve felled all parts of the tree successfully, it’s important to dispose of it properly.

Dispose of the Tree Properly

Make sure to properly dispose of the tree once it’s been felled, as neglecting this important step could create unnecessary risks and hazards for you and your neighbors. The first step is to remove all branches and limbs from the trunk, cutting them into manageable pieces that can be easily transported.

Next, cut the trunk into sections that are no longer than six feet in length so they can be safely loaded onto a truck or trailer for transport.

When disposing of the tree, check with your local municipality to find out if they have any specific requirements or guidelines for disposal. Many cities offer curbside pickup for yard waste, while others require you to drop off the tree at a designated location. It’s important to follow these guidelines to ensure that you’re not breaking any laws or putting anyone else at risk.

With proper disposal completed, it’s time to review safety protocols and tips for next time.

Review Safety Protocols and Tips for Next Time

Before attempting future tree removals, it’s crucial to review and implement proper safety protocols. This will not only protect you and your property, but also anyone else in the area.

Make sure you have all necessary tools and equipment, such as hard hats, gloves, eye protection, chainsaws, ropes, and ladders. It’s also important to check the weather forecast beforehand to avoid working during strong winds or storms.

Another safety measure is to always have a buddy nearby who can help you if needed. They can assist with cutting branches or securing ropes while you work on the tree. Additionally, make sure that the area around the tree is clear of people and pets before starting any work.

Always remember to communicate clearly with your partner and establish a plan for emergency situations before beginning any work on the tree. By taking these precautions seriously, you can ensure that your future DIY tree removal projects are completed safely and efficiently.

In conclusion, DIY tree removal can be a risky task if proper safety measures aren’t taken into account. Always prioritize safety by reviewing protocols beforehand and having adequate safety gear available during the job. Having a partner present during the process adds an extra layer of protection in case anything goes wrong. Remembering these tips will allow adventurous homeowners to safely remove trees from their property without risking injury or damage to their home or surrounding areas.

Frequently Asked Questions

How much should I expect to spend on equipment for DIY tree removal?

Looking to take on the challenge of DIY tree removal? One of the biggest factors you’ll need to consider is the cost of equipment.

Depending on the size and location of the tree, you may need a chainsaw, ropes, harnesses, ladders, and possibly even a wood chipper. While purchasing all this equipment can be costly upfront, it’s important to invest in quality tools that will get the job done safely and efficiently.

Consider renting equipment if you only plan on tackling one or two trees. Remember: safety should always come first when it comes to tree removal.

What are some common mistakes that people make during DIY tree removal?

When attempting to remove a tree on your own, it’s important to be aware of the most common mistakes that people make.

One mistake is underestimating the size and weight of the tree, which can lead to improper equipment use and dangerous situations.

Another common mistake is not properly identifying potential hazards such as power lines or nearby buildings.

It’s also crucial to avoid working alone, as having someone else there can provide assistance and help in case of an emergency.

Finally, failing to follow proper safety procedures such as wearing protective gear and securing tools can lead to serious injuries.

By being aware of these common mistakes and taking the necessary precautions, you can ensure a safer DIY tree removal experience.

Can I remove a tree from my property if it’s located near power lines?

If you’re considering removing a tree from your property that’s located near power lines, it’s important to understand the potential risks involved. Electrocuting is one of the leading causes of fatalities in the logging industry, according to OSHA. This means that attempting to remove a tree near power lines without proper training and equipment could put you in serious danger.

It’s always best to consult with a professional arborist or utility company before attempting any tree removal close to power lines. They have the expertise and specialized equipment necessary to safely complete the job while minimizing risk to both people and property.

How do I dispose of the tree once it’s been removed?

Once you’ve successfully removed a tree from your property, it’s important to properly dispose of it.

One option is to take the tree to a local landfill or recycling center that accepts yard waste.

Some areas may also offer curbside pickup for large items like trees, but be sure to check with your municipality for specific guidelines and regulations.

If you have a wood chipper, you can also turn the branches and trunk into mulch for use in your garden.

No matter which method you choose, be sure to follow all safety precautions when handling and transporting the tree debris.

What should I do if I encounter unexpected obstacles while removing the tree?

Encountering unexpected obstacles while removing a tree can be daunting, but don’t worry! You must remain calm and assess the situation.

If the obstacle is small enough, you may be able to remove it with your tools or by cutting around it.

However, if the obstacle is too large or dangerous to remove, don’t hesitate to call in a professional for assistance.

Remember that safety should always come first when removing a tree on your own. So take your time and carefully evaluate any challenges that arise during the process to ensure successful removal without injury or damage to property.

Conclusion

Congratulations! You’ve successfully removed a tree from your property. However, before you pat yourself on the back too much, it’s important to remember that DIY tree removal can be an incredibly dangerous task.

Always assess the tree and determine if removal is safe for you to do on your own. Remember to gather all of the necessary equipment and prepare the work area before making any cuts.

Did you know that according to the National Safety Council, falls are one of the leading causes of unintentional injury and death in homes? This statistic alone highlights just how crucial it is to take safety seriously when removing trees from your property.

By following proper safety protocols and tips, not only can you avoid injury but also ensure that your next DIY project will be completed safely and effectively.

In conclusion, while DIY tree removal may seem like a thrilling adventure for some homeowners, it’s important to prioritize safety above all else. Assessing the tree beforehand, gathering necessary equipment, preparing the work area properly, making clean cuts with precision tools, and reviewing safety protocols are all essential steps in ensuring both a successful outcome and avoiding any potential injuries.

So go ahead – tackle that project with confidence – but always remember to put safety first!

Related Source

Dangers of DIY Tree Removal


from AAA Tree Lopping Ipswich https://ift.tt/jg6XaSE
via IFTTT

Decoding Tree Trimming Costs Navigating the Investment in Your Arboreal Assets

Budgeting for Tree Trimming: Making Informed Decisions About Your Arboreal Investments

You may not realize it, but your trees are valuable assets that require proper maintenance to ensure their health and longevity. Tree trimming is an essential part of this maintenance, as it helps to keep your trees healthy and safe while enhancing their beauty and functionality.

However, navigating the costs associated with tree trimming can be confusing and overwhelming. That’s why we’ve created this guide to help you decode tree trimming costs, so you can make informed decisions about investing in your arboreal assets.

When it comes to tree trimming costs, there are several factors that come into play. These include the size of your trees, the type of trimming services needed, the accessibility of your property, and the experience level of your service provider.

Understanding these factors will help you navigate the various options available for tree trimming services and choose a provider that fits both your budget and needs. So let’s dive in and explore how you can effectively invest in regular tree maintenance without breaking the bank.

Factors that Affect Tree Trimming Costs

You’ll want to pay close attention to what affects the price of trimming your trees so you can make informed decisions and avoid any unexpected costs. One major factor that impacts tree trimming costs is the size of the tree. The larger the tree, the more difficult it is for arborists to access and trim it properly. This means that larger trees require more time, specialized equipment, and skilled labor, which all contribute to a higher cost.

Another factor that affects tree trimming costs is the health and condition of the tree. If a tree is diseased or damaged, it may require more extensive pruning or removal altogether. Additionally, if a tree has overgrown branches that are encroaching on nearby structures or power lines, this will also affect the cost as specialized techniques must be used to ensure safety during trimming.

Understanding these factors can help you anticipate costs associated with your specific trees and make informed decisions about when and how often they need trimming services. With this knowledge in mind, let’s dive deeper into understanding different types of tree trimming services.

Understanding the Different Types of Tree Trimming Services

Learning about the various trimming services available can help you make informed decisions on how to care for your trees. There are different types of tree trimming services, and each is designed to address specific issues with your trees.

For instance, standard trimming focuses on removing branches that are dead, diseased, or have grown too close together. This type of trimming enhances the overall appearance of your trees and promotes healthy growth.

Another type of tree trimming service is crown reduction. As the name suggests, this service reduces the size of a tree’s crown by removing its branches selectively. Crown reduction helps in alleviating stress on weak branches and improves structural integrity. It also allows more sunlight to penetrate into the canopy, promoting better photosynthesis and improving overall health.

Understanding these different types of tree trimming services will help you determine which one is best suited for your needs and ensure that you invest wisely in maintaining healthy arboreal assets.

Now that you have a better understanding of the various tree trimming services available, it’s time to choose the right provider for your needs.

How to Choose the Right Tree Trimming Service Provider

Like a gardener carefully selecting the right tools for their plants, finding the right tree trimming service provider is crucial for the health and beauty of your outdoor space. Here are some tips to help you choose the best one:

  1. Look for certified arborists: A certified arborist is someone who’s been trained in tree care and maintenance. They have the knowledge and experience to properly trim trees without causing damage.
  2. Check for insurance: Tree trimming can be dangerous work, so it’s important that your service provider is insured. This protects you from any liability if something goes wrong during the job.
  3. Get references: Ask for references from past customers to see how satisfied they were with the service provided.
  4. Compare quotes: Don’t just go with the first company you find – get quotes from several different providers to compare prices and services.

By following these tips, you can ensure that you choose a reputable tree trimming service provider that’ll keep your trees healthy and beautiful.

Now, let’s move on to tips for negotiating tree trimming costs without breaking the bank.

Tips for Negotiating Tree Trimming Costs

It’s important to be savvy when it comes to negotiating the price of maintaining your trees, so here are some tips for getting the best deal possible.

Firstly, do your research and get quotes from multiple tree trimming service providers. This will allow you to compare prices and services offered, giving you leverage in negotiations.

Secondly, don’t be afraid to ask for a discount or negotiate a lower price. Many tree trimming companies are willing to work with customers on pricing if they feel like they may lose the job otherwise. Additionally, consider offering to pay in cash instead of credit card as this can sometimes result in a lower price due to avoiding processing fees.

By following these tips, you can ensure that you’re getting the most value for your money when it comes to maintaining your trees.

When it comes to investing in regular tree maintenance, one key factor is understanding how often and what type of trimming is necessary for each specific tree species.

Investing in Regular Tree Maintenance

Maintaining your trees is like giving your car regular oil changes – it’s essential for keeping them healthy and thriving. Regular tree maintenance involves several activities such as pruning, trimming, fertilizing, and watering.

The benefits of investing in regular tree maintenance are numerous. Firstly, it enhances the overall health of your trees by removing dead or diseased branches that can cause harm to other parts of the tree. Secondly, it improves the aesthetics of your yard by maintaining a well-manicured appearance. Lastly, regular maintenance reduces safety hazards such as falling limbs that may cause injury to people or damage property.

To ensure proper maintenance of your trees, hire a professional arborist who will assess the health of your tree and recommend an appropriate course of action. Factors such as age, species, location, and weather conditions will determine how often you need to maintain your trees. For example, younger trees require more frequent pruning while older ones require less pruning but may need more attention in terms of fertilization and pest control measures.

Overall, investing in regular tree maintenance pays off in the long run by improving the health and longevity of your arboreal assets while adding value to your property.

In conclusion, navigating the investment in your arboreal assets and decoding tree trimming costs is worth the effort. By grouping complete sentences on their own lines and using contractions, you can better understand the benefits of regular tree maintenance and ensure the health and safety of your trees.

Conclusion and Final Thoughts

Don’t let your trees become a liability; keep them healthy and safe with regular maintenance from a professional arborist. Investing in the regular care of your trees ensures they remain strong, healthy, and beautiful for years to come.

Not only does regular maintenance prevent potential safety hazards, but it also enhances the aesthetic appeal of your property. By working with a skilled arborist, you can ensure that your trees receive the proper care they need to thrive.

A professional tree service will assess the health of your trees and perform necessary measures such as pruning, fertilization, and pest control. With ongoing maintenance and care, you can prevent costly damage caused by sick or weak trees while protecting both yourself and your investment.

Remember that investing in regular tree maintenance is an investment in the longevity and value of your arboreal assets. In conclusion, caring for your trees is essential not only for their health but also for maintaining their beauty and adding value to your property.

Regularly scheduled maintenance from a professional arborist is crucial in ensuring that your trees are well-maintained year-round, preventing potential hazards before they occur. So don’t wait until it’s too late; schedule an appointment today to give yourself peace of mind knowing that your arboreal assets are being taken care of by experienced professionals who understand what it takes to keep them looking great!

Frequently Asked Questions

What are the legal requirements for tree trimming in my area?

When it comes to tree trimming, the legal requirements can vary depending on where you live. It’s important to do your research and understand what regulations are in place in your area.

Some cities may require a permit for any tree trimming or removal, while others may have specific guidelines for how much of a tree can be trimmed at one time. Additionally, there may be rules regarding the use of certain equipment or techniques during the trimming process.

Failing to adhere to these regulations can result in fines or even legal action. So before you start trimming those branches, make sure you know what’s required of you by law.

Can tree trimming be done during any season or are there specific times of the year that are best?

When it comes to tree trimming, timing is key. While you may be tempted to prune your trees at any time of the year, there are specific seasons that are best for this task.

For deciduous trees, winter is the ideal season as they’re dormant and have shed their leaves. This allows you to get a clear view of the tree’s structure and make precise cuts without damaging any foliage.

On the other hand, evergreen trees can be trimmed in late winter or early spring before new growth begins. It’s important to avoid pruning during extreme weather conditions such as high winds or heavy rain as this can make the task dangerous and ineffective.

By understanding the best time for tree trimming, you can ensure healthy growth, improve aesthetics, and prevent potential hazards on your property.

How long does it typically take for a tree trimming service to complete the job?

When it comes to tree trimming services, the duration of the job can vary greatly depending on a number of factors. The size and complexity of the job, as well as the number of trees being trimmed, will all play a role in how long it takes for the service to complete the work.

In general, most tree trimming services can complete a typical job within a day or two, but larger jobs may take several days or even weeks to finish. It’s important to discuss these details with your chosen service provider before hiring them so that you have a clear understanding of what to expect in terms of timeline and costs.

Are there any risks or potential dangers associated with tree trimming?

If you’re considering tree trimming, there are certainly risks and potential dangers to be aware of. First and foremost is the risk of injury to yourself or others if proper safety precautions aren’t taken. Additionally, incorrect trimming techniques can damage the tree itself, leading to weakened limbs that may break off in a storm or other weather event.

It’s important to hire a professional tree service with experience in safe and effective trimming methods, as well as liability insurance in case of any accidents or property damage. With the right expertise on your side, however, tree trimming can be a valuable investment in maintaining the health and beauty of your arboreal assets for years to come.

Is there a difference in cost between trimming trees in a residential area versus a commercial area?

When it comes to tree trimming, the cost can vary depending on whether you’re in a residential or commercial area. Generally, trimming trees in a commercial area tends to be more expensive due to factors such as accessibility and safety concerns.

In a residential area, trees are typically easier to access and pose less of a risk. However, the type of tree and its size also play a role in determining the cost. It’s important to consult with an arborist who can assess your specific needs and provide an accurate estimate for any tree trimming services you require.

Conclusion

Congratulations! You’ve successfully navigated the world of tree trimming costs and learned how to invest in your arboreal assets.

Just like a ship captain navigating through rough waters, you now have the tools to steer your trees towards health and beauty.

Remember, there are several factors that affect tree trimming costs such as size, location, and complexity. Knowing the different types of services available will help you choose the right service provider for your needs.

Don’t be afraid to negotiate pricing or invest in regular maintenance to keep your trees healthy.

In conclusion, just like a gardener tending to their plants, investing in tree maintenance is an investment in the long-term health and beauty of your property.

Use these tips to navigate the world of tree trimming costs with ease and confidence. Happy trimming!

Related Source

4 Reasons Tree Trimming Is Important


from AAA Tree Lopping Ipswich https://ift.tt/iHk3pCE
via IFTTT

Battling Tree Fungus Effective Treatment Strategies to Protect Your Green Giants

Combatting Tree Fungus: Expert Approaches to Shielding Your Stunning Green Giants

Do you have a lush, green tree in your yard that is the envy of the neighborhood? Nothing can be more disheartening than watching it slowly wither away due to tree fungus. Trees are not only beautiful but also provide numerous benefits such as shade, oxygen, and habitat for wildlife. Therefore, it is vital to take care of them and protect them from fungal infections.

Tree fungus can infect any part of a tree – the leaves, branches, trunk or roots. It can be caused by various factors such as poor soil drainage, overwatering, lack of sunlight or air circulation, insect infestation or damage caused by pruning equipment. However, with proper understanding and preventive measures in place, you can limit the risk of infection and save your beloved trees from harm.

In this article, we will explore cultural practices to prevent fungal infections along with chemical treatments and biological control methods that can effectively combat tree fungus. Additionally, we will discuss how regular maintenance and seeking professional help when necessary can help ensure healthy trees for years to come.

Understanding Tree Fungus

Let’s dive into the world of fungal infections and how they can harm your beloved trees. Fungi are microorganisms that live in soil, air, water, and on plants. Some fungi are beneficial to trees by breaking down dead organic matter and recycling nutrients back into the soil. However, some fungi can cause severe damage to tree health by infecting roots, stems, branches, leaves or fruit.

Tree fungus infections result in a wide range of symptoms such as leaf spots, wilting or yellowing of leaves, premature defoliation, dieback of twigs and branches or even death of the entire tree. Different types of fungi attack different parts of a tree depending on their life cycle and host specificity. Understanding the type of fungus causing infection is crucial for selecting appropriate treatment strategies to protect your green giants against further damage caused by fungal diseases.

Now let’s take a look at cultural practices that can prevent fungal infections from occurring in the first place.

Cultural Practices to Prevent Fungal Infections

By implementing proper upkeep techniques, you can cultivate a flourishing environment for your beloved trees and prevent the onset of tree fungus. Here are some essential cultural practices to keep in mind:

  1. Watering: Overwatering or underwatering is harmful to trees and creates an environment conducive to fungal growth. Ensure that your trees receive adequate water, depending on their species and location.
  2. Pruning: Regular pruning helps eliminate deadwood, weak branches, and other potential sources of infection. It also improves air circulation within the canopy, reducing moisture retention.
  3. Sanitation: Proper disposal of fallen leaves, twigs, and other debris prevents the buildup of fungi spores around tree bases.
  4. Soil health: Trees thrive in well-draining soil with balanced nutrients. Fertilize your trees wisely based on soil tests results.

Cultural practices form an important foundation for maintaining healthy trees free from fungal infections. However, sometimes they might not be enough to prevent or treat existing infections effectively. Therefore, we’ll discuss chemical treatments for tree fungus next…

Tree care

Chemical Treatments for Tree Fungus

To effectively combat fungal infections in your trees, you may need to consider chemical treatments as a supplement to your cultural practices. Chemical treatments can be highly effective if used properly, but they should only be applied by trained professionals.

When treating tree fungus with chemicals, it’s important to identify the specific type of fungus affecting your tree and choose a treatment that targets that particular strain. There are several different classes of fungicides available for treating tree fungus, including contact fungicides and systemic fungicides.

Contact fungicides work by killing the fungus on the surface of the tree and must be reapplied regularly. Systemic fungicides, on the other hand, are absorbed into the tree’s vascular system and provide longer-lasting protection against infection.

While these treatments can be effective in controlling fungal infections in trees, it’s important to remember that they should always be used in conjunction with good cultural practices like proper pruning and watering techniques.

As you explore different options for treating fungal infections in your trees, keep in mind that chemical treatments are just one piece of the puzzle. In addition to using chemicals when necessary, there are also many biological control methods that can help protect your green giants from infection without relying on harsh chemicals or pesticides.

Biological Control Methods

The best way to naturally combat pesky fungal infections in your trees is by utilizing biological control methods, which can work wonders for keeping your greenery healthy and thriving.

One such method is introducing beneficial fungi that compete with the harmful fungus for resources. These beneficial fungi, known as mycorrhizae, form a symbiotic relationship with your tree’s roots and provide it with essential nutrients while also protecting it from pathogenic fungi.

Another effective biological control method is using bacteria to fight off fungal infections. Bacillus subtilis, for example, produces antibiotics that inhibit the growth of harmful fungi on your trees. Additionally, some bacteria species can also stimulate your tree’s natural defenses against disease and infection.

By incorporating these natural methods into your tree care routine, you can minimize the need for harsh chemical treatments and keep your trees strong and healthy. Moving forward into prevention and maintenance, there are several steps you can take to further protect your trees from fungal infections.

Prevention and Maintenance

Ready to keep your trees healthy and thriving? Let’s dive into some simple prevention and maintenance techniques to combat those pesky fungal infections.

Firstly, it’s important to maintain proper tree hygiene by removing any dead or diseased branches regularly. This prevents the spread of fungi spores that can potentially infect healthy parts of the tree.

Secondly, make sure your trees are getting enough sunlight and air circulation. Fungi thrive in dark, damp environments so pruning back neighboring plants or structures that may be obstructing light and airflow is crucial. Additionally, avoid overwatering your trees as excess moisture can create an ideal breeding ground for fungus.

By implementing these preventative measures, you can significantly reduce the likelihood of a fungal infection taking hold in your precious green giants.

To take things a step further, seeking professional help from certified arborists who have experience with identifying and treating tree diseases is always a wise choice. They can provide expert advice on specific prevention strategies tailored to the unique needs of your trees and property.

Seeking Professional Help

If you’re dealing with a tree problem that’s beyond your expertise, it’s time to call an arborist.

Choosing the right professional is crucial in ensuring that your trees receive the best care possible.

When working with tree care experts, be sure to communicate clearly and ask questions to ensure that you understand their recommendations and actions taken.

When to call an arborist

It’s always a good idea to bring in an expert when your beloved trees need some TLC – think of it like calling in a doctor for your leafy friends. But when exactly should you call an arborist?

The answer depends on the symptoms and severity of the tree’s condition. If you notice any signs of decay, such as mushrooms growing at the base of the trunk or yellowing leaves that fall off prematurely, it’s best to call in a professional right away.

Other indications that you may need an arborist include cracks or splits in the trunk, large dead branches, or signs of insect infestation. Additionally, if you have concerns about the overall health and appearance of your trees but aren’t sure what’s causing them, it never hurts to consult with an expert.

Remember: prevention is key, and catching problems early can save both money and heartache down the road. With this information in mind, let’s take a look at how to choose the right professional for your needs.

Choosing the right professional

To ensure you get the best care for your trees, it’s important to choose the right professional – someone who has the expertise and experience needed to diagnose and treat any issues.

When searching for a tree care expert, there are several factors to consider. Firstly, check their credentials and certifications. Look for a certified arborist who has undergone extensive training in tree care and maintenance. A certified arborist can provide you with valuable advice on how to protect your trees from diseases such as fungus.

Secondly, ask for references from previous clients or do some research online to read reviews about the company or individual. This will give you an idea of their level of professionalism and quality of work. Also, make sure that they have liability insurance and workers’ compensation insurance in case of any accidents during the job.

When choosing a tree care professional, keep in mind that not all services are created equal. Take your time to find a reputable company or individual who can provide you with top-notch service and advice on how to protect your green giants from harmful fungi.

With the right expert by your side, you can rest assured that your trees will thrive for years to come without facing any issues caused by fungus or other problems related to poor maintenance practices.

Now that you’ve found a qualified arborist, let’s move on to working with them effectively so that they can help you protect your trees against fungal diseases!

Working with tree care experts

Working with a tree care expert can greatly improve the health and longevity of your trees. Research has shown that regular maintenance and care can increase property values by up to 20%.

To ensure your trees are properly cared for, it’s essential to find a reputable tree care company. Look for companies that have certified arborists on staff, as they have the knowledge and expertise needed to diagnose and treat various tree diseases.

When working with a tree care expert, it’s important to communicate any concerns or issues you may have with your trees. Good communication between you and your tree specialist will ensure that all necessary treatments are carried out promptly.

Make sure to ask questions and stay informed about the work being done on your property. A good tree care company should be transparent about their practices and willing to provide you with information regarding the treatments they recommend for your trees.

By working together with a trusted professional, you can help protect your trees from harmful fungi and ensure that they remain healthy for years to come.

Tree care

Frequently Asked Questions

Can tree fungus infections spread to other trees in the surrounding area?

If you’ve noticed a tree fungus infection, it’s important to act quickly. One concern is whether the infection can spread to nearby trees. Unfortunately, the answer is yes. Fungal spores can easily travel through the air and infect other trees. The fungus can also spread through intertwined roots. It’s crucial to identify and treat infections as soon as possible to prevent further damage.

Remember to use contractions.

Is it possible for a tree to recover from a severe fungal infection?

Recovering from a severe fungal infection isn’t impossible, but it’s not guaranteed.

In fact, studies show that only about 50% of trees with severe infections are able to recover and survive. It largely depends on the type of fungus, the severity of the infection, and how quickly treatment is administered.

Some species of trees are more resilient than others and may have a better chance at recovery. However, even if a tree does recover from a fungal infection, it may be weakened and more susceptible to future infections or other stressors such as drought or pests.

Proper care and maintenance can help increase the chances of recovery and long-term health for your green giants.

How long does it take for chemical treatments to start working against tree fungus?

If you’re dealing with a fungal infection in your trees, you may be wondering how long chemical treatments take to start working. The answer depends on several factors, including the type of fungus and the severity of the infection.

In many cases, it can take several weeks or even months for the treatment to begin showing results. However, it’s important to remember that chemical treatments are just one part of a comprehensive approach to managing tree fungus.

Proper pruning, watering, and fertilization can also help promote healthy growth and prevent future infections. Ultimately, the best course of action will depend on the specific needs of your trees and the extent of the infection.

Are there any natural remedies that can be used to prevent or treat tree fungus?

Looking for natural remedies to prevent or treat tree fungus? Luckily, there are a variety of options available.

One effective method is using a combination of baking soda and water as a spray on the affected trees.

Another option is to use compost tea, which can help boost the health of your trees and make them more resistant to fungal infections.

You can also try using neem oil, which has antifungal properties and can be applied directly to the affected areas.

While these natural remedies may not work as quickly as chemical treatments, they can be just as effective in keeping your green giants healthy and thriving.

What are the potential risks and side effects of using chemical treatments for tree fungus?

When it comes to treating tree fungus, chemical treatments can be effective but also come with potential risks and side effects. These treatments often contain harsh chemicals that can harm the environment and surrounding wildlife.

Additionally, if not applied correctly or in the right conditions, they may not work as intended and result in wasted time and money. It’s important to carefully research and consider all options before deciding on a chemical treatment for your trees.

Conclusion

Congratulations! You’ve learned how to effectively battle tree fungus and protect your green giants. With cultural practices like proper pruning and watering, chemical treatments such as fungicides, and biological control methods like introducing beneficial fungi, you can keep your trees healthy and strong.

But let’s be real here – even with all these strategies in place, there will always be a risk of fungal infections. So while it’s important to take preventative measures, don’t beat yourself up if your trees do end up succumbing to fungus.

After all, what fun would gardening be without a little bit of irony? Just remember to stay vigilant and seek professional help if needed. Happy gardening!

Related Source

Insect & Disease Control Expert Diagnosis


from AAA Tree Lopping Ipswich https://ift.tt/YgnOW1I
via IFTTT